Gallery:Rhythm Heaven Megamix: Difference between revisions
TheJoeMaster (talk | contribs) m (→Logos: added the alternate European logo (the one that is sourced from a Spanish commercial)) |
(→Epilogues: Added epilogues) |
||
| Line 552: | Line 552: | ||
===Epilogues=== | ===Epilogues=== | ||
;Honeybee Land | ;Honeybee Land | ||
<gallery perrow=3> | |||
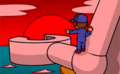
Epilogue 3DS Karate Man NG.png|[[Karate Man (3DS)|Karate Man]] (Try Again) | |||
Epilogue 3DS Karate Man OK.png|Karate Man (OK) | |||
Epilogue 3DS Karate Man HI.png|Karate Man (Superb) | |||
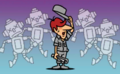
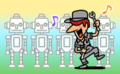
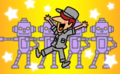
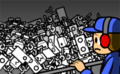
Epilogue 3DS Fillbots NG.png|[[Fillbots]] (Try Again) | |||
Epilogue 3DS Fillbots OK.png|Fillbots (OK) | |||
Epilogue 3DS Fillbots HI.png|Fillbots (Superb) | |||
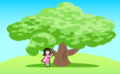
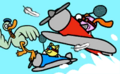
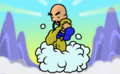
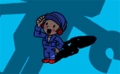
Epilogue 3DS Air Rally NG.png|[[Air Rally]] (Try Again) | |||
Epilogue 3DS Air Rally OK.png|Air Rally (OK) | |||
Epilogue 3DS Air Rally HI.png|Air Rally (Superb) | |||
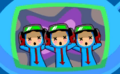
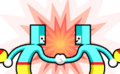
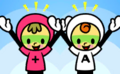
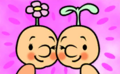
Epilogue 3DS Catchy Tune NG.png|[[Catchy Tune]] (Try Again) | |||
Epilogue 3DS Catchy Tune OK.png|Catchy Tune (OK) | |||
Epilogue 3DS Catchy Tune HI.png|Catchy Tune (Superb) | |||
</gallery> | |||
;Machine Land | ;Machine Land | ||
<gallery perrow=3> | |||
Epilogue 3DS Rhythm Tweezers NG.png|[[Rhythm Tweezers]] (Try Again) | |||
Epilogue 3DS Rhythm Tweezers OK.png|Rhythm Tweezers (OK) | |||
Epilogue 3DS Rhythm Tweezers HI.png|Rhythm Tweezers (Superb) | |||
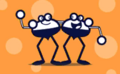
Epilogue 3DS Glee Club NG.png|[[Glee Club]] (Try Again) | |||
Epilogue 3DS Glee Club OK.png|Glee Club (OK) | |||
Epilogue 3DS Glee Club HI.png|Glee Club (Superb) | |||
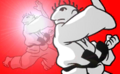
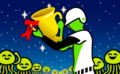
Epilogue 3DS Figure Fighter NG.png|[[Figure Fighter]] (Try Again) | |||
Epilogue 3DS Figure Fighter OK.png|Figure Fighter (OK) | |||
Epilogue 3DS Figure Fighter HI.png|Figure Fighter (Superb) | |||
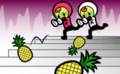
Epilogue 3DS Fruit Basket NG.png|[[Fruit Basket]] (Try Again) | |||
Epilogue 3DS Fruit Basket OK.png|Fruit Basket (OK) | |||
Epilogue 3DS Fruit Basket HI.png|Fruit Basket (Superb) | |||
</gallery> | |||
;Citrus Land | ;Citrus Land | ||
<gallery perrow=3> | |||
Epilogue 3DS The Clappy Trio NG.png|[[The Clappy Trio]] (Try Again) | |||
Epilogue 3DS The Clappy Trio OK.png|The Clappy Trio (OK) | |||
Epilogue 3DS The Clappy Trio HI.png|The Clappy Trio (Superb) | |||
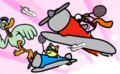
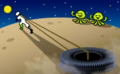
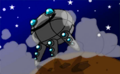
Epilogue 3DS Shoot-'em-up NG.png|[[Shoot-'em-up]] (Try Again) | |||
Epilogue 3DS Shoot-'em-up OK.png|Shoot-'em-up (OK) | |||
Epilogue 3DS Shoot-'em-up HI.png|Shoot-'em-up (Superb) | |||
Epilogue 3DS Micro-Row NG.png|[[Micro-Row]] (Try Again) | |||
Epilogue 3DS Micro-Row OK.png|Micro-Row (OK) | |||
Epilogue 3DS Micro-Row HI.png|Micro-Row (Superb) | |||
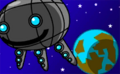
Epilogue 3DS First Contact NG.png|[[First Contact]] (Try Again) | |||
Epilogue 3DS First Contact OK.png|First Contact (OK) | |||
Epilogue 3DS First Contact HI.png|First Contact (Superb) | |||
</gallery> | |||
;Donut Land | ;Donut Land | ||
<gallery perrow=3> | |||
Epilogue 3DS Bunny Hop NG.png|[[Bunny Hop]] (Try Again) | |||
Epilogue 3DS Bunny Hop OK.png|Bunny Hop (OK) | |||
Epilogue 3DS Bunny Hop HI.png|Bunny Hop (Superb) | |||
Epilogue 3DS Airboarder NG.png|[[Airboarder]] (Try Again) | |||
Epilogue 3DS Airboarder OK.png|Airboarder (OK) | |||
Epilogue 3DS Airboarder HI.png|Airboarder (Superb) | |||
Epilogue 3DS Exhibition Match NG.png|[[Exhibition Match]] (Try Again) | |||
Epilogue 3DS Exhibition Match OK.png|Exhibition Match (OK) | |||
Epilogue 3DS Exhibition Match HI.png|Exhibition Match (Superb) | |||
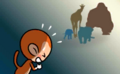
Epilogue 3DS Tongue Lashing NG.png|[[Tongue Lashing]] (Try Again) | |||
Epilogue 3DS Tongue Lashing OK.png|Tongue Lashing (OK) | |||
Epilogue 3DS Tongue Lashing HI.png|Tongue Lashing (Superb) | |||
</gallery> | |||
;Barbershop Land | ;Barbershop Land | ||
<gallery perrow=3> | |||
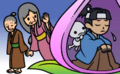
Epilogue 3DS Sneaky Spirits NG.png|[[Sneaky Spirits]] (Try Again) | |||
Epilogue 3DS Sneaky Spirits OK.png|Sneaky Spirits (OK) | |||
Epilogue 3DS Sneaky Spirits HI.png|Sneaky Spirits (Superb) | |||
Epilogue 3DS Rhythm Rally NG.png|[[Rhythm Rally]] (Try Again) | |||
Epilogue 3DS Rhythm Rally OK.png|Rhythm Rally (OK) | |||
Epilogue 3DS Rhythm Rally HI.png|Rhythm Rally (Superb) | |||
Epilogue 3DS Flipper-Flop NG.png|[[Flipper-Flop]] (Try Again) | |||
Epilogue 3DS Flipper-Flop OK.png|Flipper-Flop (OK) | |||
Epilogue 3DS Flipper-Flop HI.png|Flipper-Flop (Superb) | |||
Epilogue 3DS LumBEARjack NG.png|[[LumBEARjack]] (Try Again) | |||
Epilogue 3DS LumBEARjack OK.png|LumBEARjack (OK) | |||
Epilogue 3DS LumBEARjack HI.png|LumBEARjack (Superb) | |||
</gallery> | |||
;Songbird Land | ;Songbird Land | ||
<gallery perrow=3> | |||
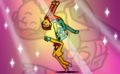
Epilogue 3DS Power Calligraphy NG.png|[[Power Calligraphy]] (Try Again) | |||
Epilogue 3DS Power Calligraphy OK.png|Power Calligraphy (OK) | |||
Epilogue 3DS Power Calligraphy HI.png|Power Calligraphy (Superb) | |||
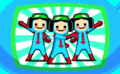
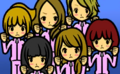
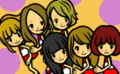
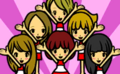
Epilogue 3DS Blue Birds NG.png|[[Blue Birds]] (Try Again) | |||
Epilogue 3DS Blue Birds OK.png|Blue Birds (OK) | |||
Epilogue 3DS Blue Birds HI.png|Blue Birds (Superb) | |||
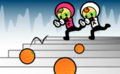
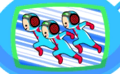
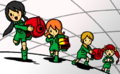
Epilogue 3DS Flock Step NG.png|[[Flock Step]] (Try Again) | |||
Epilogue 3DS Flock Step OK.png|Flock Step (OK) | |||
Epilogue 3DS Flock Step HI.png|Flock Step (Superb) | |||
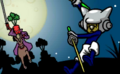
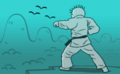
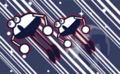
Epilogue 3DS Super Samurai Slice NG.png|[[Super Samurai Slice]] (Try Again) | |||
Epilogue 3DS Super Samurai Slice OK.png|Super Samurai Slice (OK) | |||
Epilogue 3DS Super Samurai Slice HI.png|Super Samurai Slice (Superb) | |||
</gallery> | |||
;Lush Tower | ;Lush Tower | ||
<gallery perrow=3> | |||
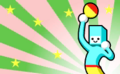
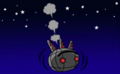
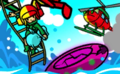
Epilogue 3DS Spaceball NG.png|[[Spaceball]] (Try Again) | |||
Epilogue 3DS Spaceball OK.png|Spaceball (OK) | |||
Epilogue 3DS Spaceball HI.png|Spaceball (Superb) | |||
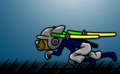
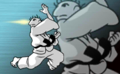
Epilogue 3DS Dog Ninja NG.png|[[Dog Ninja]] (Try Again) | |||
Epilogue 3DS Dog Ninja OK.png|Dog Ninja (OK) | |||
Epilogue 3DS Dog Ninja HI.png|Dog Ninja (Superb) | |||
Epilogue 3DS Hole in One NG.png|[[Hole in One]] (Try Again) | |||
Epilogue 3DS Hole in One OK.png|Hole in One (OK) | |||
Epilogue 3DS Hole in One HI.png|Hole in One (Superb) | |||
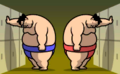
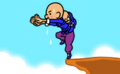
Epilogue 3DS Sumo Brothers NG.png|[[Sumo Brothers]] (Try Again) | |||
Epilogue 3DS Sumo Brothers OK.png|Sumo Brothers (OK) | |||
Epilogue 3DS Sumo Brothers HI.png|Sumo Brothers (Superb) | |||
Epilogue 3DS Lush Remix NG.png|[[Lush Remix]] (Try Again) | |||
Epilogue 3DS Lush Remix OK.png|Lush Remix (OK) | |||
Epilogue 3DS Lush Remix HI.png|Lush Remix (Superb) | |||
</gallery> | |||
;Honeybee Tower | ;Honeybee Tower | ||
<gallery perrow=3> | |||
Epilogue 3DS Karate Man Returns! NG.png|[[Karate Man Returns!]] (Try Again) | |||
Epilogue 3DS Karate Man Returns! OK.png|Karate Man Returns! (OK) | |||
Epilogue 3DS Karate Man Returns! HI.png|Karate Man Returns! (Superb) | |||
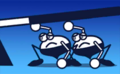
Epilogue 3DS Fillbots 2 NG.png|[[Fillbots 2]] (Try Again) | |||
Epilogue 3DS Fillbots 2 OK.png|Fillbots 2 (OK) | |||
Epilogue 3DS Fillbots 2 HI.png|Fillbots 2 (Superb) | |||
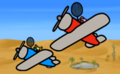
Epilogue 3DS Air Rally 2 NG.png|[[Air Rally 2]] (Try Again) | |||
Epilogue 3DS Air Rally 2 OK.png|Air Rally 2 (OK) | |||
Epilogue 3DS Air Rally 2 HI.png|Air Rally 2 (Superb) | |||
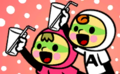
Epilogue 3DS Catchy Tune 2 NG.png|[[Catchy Tune 2]] (Try Again) | |||
Epilogue 3DS Catchy Tune 2 OK.png|Catchy Tune 2 (OK) | |||
Epilogue 3DS Catchy Tune 2 HI.png|Catchy Tune 2 (Superb) | |||
Epilogue 3DS Honeybee Remix NG.png|[[Honeybee Remix]] (Try Again) | |||
Epilogue 3DS Honeybee Remix OK.png|Honeybee Remix (OK) | |||
Epilogue 3DS Honeybee Remix HI.png|Honeybee Remix (Superb) | |||
</gallery> | |||
;Machine Tower | ;Machine Tower | ||
<gallery perrow=3> | |||
Epilogue 3DS Rhythm Tweezers 2 NG.png|[[Rhythm Tweezers 2]] (Try Again) | |||
Epilogue 3DS Rhythm Tweezers 2 OK.png|Rhythm Tweezers 2 (OK) | |||
Epilogue 3DS Rhythm Tweezers 2 HI.png|Rhythm Tweezers 2 (Superb) | |||
Epilogue 3DS Glee Club 2 NG.png|[[Glee Club 2]] (Try Again) | |||
Epilogue 3DS Glee Club 2 OK.png|Glee Club 2 (OK) | |||
Epilogue 3DS Glee Club 2 HI.png|Glee Club 2 (Superb) | |||
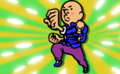
Epilogue 3DS Figure Fighter 2 NG.png|[[Figure Fighter 2]] (Try Again) | |||
Epilogue 3DS Figure Fighter 2 OK.png|Figure Fighter 2 (OK) | |||
Epilogue 3DS Figure Fighter 2 HI.png|Figure Fighter 2 (Superb) | |||
Epilogue 3DS Fruit Basket 2 NG.png|[[Fruit Basket 2]] (Try Again) | |||
Epilogue 3DS Fruit Basket 2 OK.png|Fruit Basket 2 (OK) | |||
Epilogue 3DS Fruit Basket 2 HI.png|Fruit Basket 2 (Superb) | |||
Epilogue 3DS Machine Remix NG.png|[[Machine Remix]] (Try Again) | |||
Epilogue 3DS Machine Remix OK.png|Machine Remix (OK) | |||
Epilogue 3DS Machine Remix HI.png|Machine Remix (Superb) | |||
</gallery> | |||
;Citrus Tower | ;Citrus Tower | ||
<gallery perrow=3> | |||
Epilogue 3DS The Clappy Trio 2 NG.png|[[The Clappy Trio 2]] (Try Again) | |||
Epilogue 3DS The Clappy Trio 2 OK.png|The Clappy Trio 2 (OK) | |||
Epilogue 3DS The Clappy Trio 2 HI.png|The Clappy Trio 2 (Superb) | |||
Epilogue 3DS Shoot-'em-up 2 NG.png|[[Shoot-'em-up 2]] (Try Again) | |||
Epilogue 3DS Shoot-'em-up 2 OK.png|Shoot-'em-up 2 (OK) | |||
Epilogue 3DS Shoot-'em-up 2 HI.png|Shoot-'em-up 2 (Superb) | |||
Epilogue 3DS Micro-Row 2 NG.png|[[Micro-Row 2]] (Try Again) | |||
Epilogue 3DS Micro-Row 2 OK.png|Micro-Row 2 (OK) | |||
Epilogue 3DS Micro-Row 2 HI.png|Micro-Row 2 (Superb) | |||
Epilogue 3DS Second Contact NG.png|[[Second Contact]] (Try Again) | |||
Epilogue 3DS Second Contact OK.png|Second Contact (OK) | |||
Epilogue 3DS Second Contact HI.png|Second Contact (Superb) | |||
Epilogue 3DS Citrus Remix NG.png|[[Citrus Remix]] (Try Again) | |||
Epilogue 3DS Citrus Remix OK.png|Citrus Remix (OK) | |||
Epilogue 3DS Citrus Remix HI.png|Citrus Remix (Superb) | |||
</gallery> | |||
;Donut Tower | ;Donut Tower | ||
<gallery perrow=3> | |||
Epilogue 3DS Rat Race NG.png|[[Rat Race]] (Try Again) | |||
Epilogue 3DS Rat Race OK.png|Rat Race (OK) | |||
Epilogue 3DS Rat Race HI.png|Rat Race (Superb) | |||
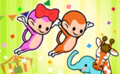
Epilogue 3DS Fan Club NG.png|[[Fan Club]] (Try Again) | |||
Epilogue 3DS Fan Club OK.png|Fan Club (OK) | |||
Epilogue 3DS Fan Club HI.png|Fan Club (Superb) | |||
Epilogue 3DS Working Dough NG.png|[[Working Dough]] (Try Again) | |||
Epilogue 3DS Working Dough OK.png|Working Dough (OK) | |||
Epilogue 3DS Working Dough HI.png|Working Dough (Superb) | |||
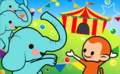
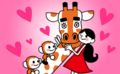
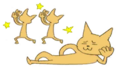
Epilogue 3DS Animal Acrobat NG.png|[[Animal Acrobat]] (Try Again) | |||
Epilogue 3DS Animal Acrobat OK.png|Animal Acrobat (OK) | |||
Epilogue 3DS Animal Acrobat HI.png|Animal Acrobat (Superb) | |||
Epilogue 3DS Donut Remix NG.png|[[Donut Remix]] (Try Again) | |||
Epilogue 3DS Donut Remix OK.png|Donut Remix (OK) | |||
Epilogue 3DS Donut Remix HI.png|Donut Remix (Superb) | |||
</gallery> | |||
;Barbershop Tower | ;Barbershop Tower | ||
<gallery perrow=3> | |||
Epilogue 3DS Sneaky Spirits 2 NG.png|[[Sneaky Spirits 2]] (Try Again) | |||
Epilogue 3DS Sneaky Spirits 2 OK.png|Sneaky Spirits 2 (OK) | |||
Epilogue 3DS Sneaky Spirits 2 HI.png|Sneaky Spirits 2 (Superb) | |||
Epilogue 3DS Rhythm Rally 2 NG.png|[[Rhythm Rally 2]] (Try Again) | |||
Epilogue 3DS Rhythm Rally 2 OK.png|Rhythm Rally 2 (OK) | |||
Epilogue 3DS Rhythm Rally 2 HI.png|Rhythm Rally 2 (Superb) | |||
Epilogue 3DS Flipper-Flop 2 NG.png|[[Flipper-Flop 2]] (Try Again) | |||
Epilogue 3DS Flipper-Flop 2 OK.png|Flipper-Flop 2 (OK) | |||
Epilogue 3DS Flipper-Flop 2 HI.png|Flipper-Flop 2 (Superb) | |||
Epilogue 3DS LumBEARjack 2 NG.png|[[LumBEARjack 2]] (Try Again) | |||
Epilogue 3DS LumBEARjack 2 OK.png|LumBEARjack 2 (OK) | |||
Epilogue 3DS LumBEARjack 2 HI.png|LumBEARjack 2 (Superb) | |||
Epilogue 3DS Barbershop Remix NG.png|[[Barbershop Remix]] (Try Again) | |||
Epilogue 3DS Barbershop Remix OK.png|Barbershop Remix (OK) | |||
Epilogue 3DS Barbershop Remix HI.png|Barbershop Remix (Superb) | |||
</gallery> | |||
;Songbird Tower | ;Songbird Tower | ||
<gallery perrow=3> | |||
Epilogue 3DS Tap Trial NG.png|[[Tap Trial]] (Try Again) | |||
Epilogue 3DS Tap Trial OK.png|Tap Trial (OK) | |||
Epilogue 3DS Tap Trial HI.png|Tap Trial (Superb) | |||
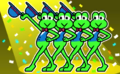
Epilogue 3DS Frog Hop NG.png|[Frog Hop[]] (Try Again) | |||
Epilogue 3DS Frog Hop OK.png|Frog Hop (OK) | |||
Epilogue 3DS Frog Hop HI.png|Frog Hop (Superb) | |||
Epilogue 3DS Ringside NG.png|[[Ringside]] (Try Again) | |||
Epilogue 3DS Ringside OK.png|Ringside (OK) | |||
Epilogue 3DS Ringside HI.png|Ringside (Superb) | |||
Epilogue 3DS Tangotronic 3000 NG.png|[[Tangotronic 3000]] (Try Again) | |||
Epilogue 3DS Tangotronic 3000 OK.png|Tangotronic 3000 (OK) | |||
Epilogue 3DS Tangotronic 3000 HI.png|Tangotronic 3000 (Superb) | |||
Epilogue 3DS Songbird Remix NG.png|[[Songbird Remix]] (Try Again) | |||
Epilogue 3DS Songbird Remix OK.png|Songbird Remix (OK) | |||
Epilogue 3DS Songbird Remix HI.png|Songbird Remix (Superb) | |||
</gallery> | |||
;Star Land | ;Star Land | ||
<gallery perrow=3> | |||
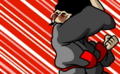
Epilogue 3DS Ninja Bodyguard NG.png|[[Ninja Bodyguard]] (Try Again) | |||
Epilogue 3DS Ninja Bodyguard OK.png|Ninja Bodyguard (OK) | |||
Epilogue 3DS Ninja Bodyguard HI.png|Ninja Bodyguard (Superb) | |||
Epilogue 3DS Freeze Frame NG.png|[[Freeze Frame]] (Try Again) | |||
Epilogue 3DS Freeze Frame OK.png|Freeze Frame (OK) | |||
Epilogue 3DS Freeze Frame HI.png|Freeze Frame (Superb) | |||
Epilogue 3DS Launch Party NG.png|[[Launch Party]] (Try Again) | |||
Epilogue 3DS Launch Party OK.png|Launch Party (OK) | |||
Epilogue 3DS Launch Party HI.png|Launch Party (Superb) | |||
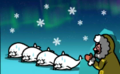
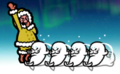
Epilogue 3DS Pajama Party NG.png|[[Pajama Party]] (Try Again) | |||
Epilogue 3DS Pajama Party OK.png|Pajama Party (OK) | |||
Epilogue 3DS Pajama Party HI.png|Pajama Party (Superb) | |||
</gallery> | |||
;Comet Land | ;Comet Land | ||
<gallery perrow=3> | |||
Epilogue 3DS Marching Orders NG.png|[[Marching Orders]] (Try Again) | |||
Epilogue 3DS Marching Orders OK.png|Marching Orders (OK) | |||
Epilogue 3DS Marching Orders HI.png|Marching Orders (Superb) | |||
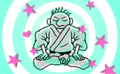
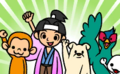
Epilogue 3DS Munchy Monk NG.png|[[Munchy Monk]] (Try Again) | |||
Epilogue 3DS Munchy Monk OK.png|Munchy Monk (OK) | |||
Epilogue 3DS Munchy Monk HI.png|Munchy Monk (Superb) | |||
Epilogue 3DS See-Saw NG.png|[[See-Saw]] (Try Again) | |||
Epilogue 3DS See-Saw OK.png|See-Saw (OK) | |||
Epilogue 3DS See-Saw HI.png|See-Saw (Superb) | |||
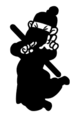
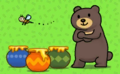
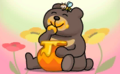
Epilogue 3DS Blue Bear NG.png|[[Blue Bear]] (Try Again) | |||
Epilogue 3DS Blue Bear OK.png|Blue Bear (OK) | |||
Epilogue 3DS Blue Bear HI.png|Blue Bear (Superb) | |||
</gallery> | |||
;Planet Land | ;Planet Land | ||
<gallery perrow=3> | |||
Epilogue 3DS Space Dance NG.png|[[Space Dance]] (Try Again) | |||
Epilogue 3DS Space Dance OK.png|Space Dance (OK) | |||
Epilogue 3DS Space Dance HI.png|Space Dance (Superb) | |||
Epilogue 3DS Lockstep NG.png|[[Lockstep]] (Try Again) | |||
Epilogue 3DS Lockstep OK.png|Lockstep (OK) | |||
Epilogue 3DS Lockstep HI.png|Lockstep (Superb) | |||
Epilogue 3DS Cheer Readers NG.png|[[Cheer Readers]] (Try Again) | |||
Epilogue 3DS Cheer Readers OK.png|Cheer Readers (OK) | |||
Epilogue 3DS Cheer Readers HI.png|Cheer Readers (Superb) | |||
Epilogue 3DS Kitties! NG.png|[[Kitties!]] (Try Again) | |||
Epilogue 3DS Kitties! OK.png|Kitties! (OK) | |||
Epilogue 3DS Kitties! HI.png|Kitties! (Superb) | |||
</gallery> | |||
;Left-Hand Tower | ;Left-Hand Tower | ||
<gallery perrow=3> | |||
Epilogue 3DS The Snappy Trio NG.png|[[The Snappy Trio]] (Try Again) | |||
Epilogue 3DS The Snappy Trio OK.png|The Snappy Trio (OK) | |||
Epilogue 3DS The Snappy Trio HI.png|The Snappy Trio (Superb) | |||
Epilogue 3DS Fan Club 2 NG.png|[[Fan Club 2]] (Try Again) | |||
Epilogue 3DS Fan Club 2 OK.png|Fan Club 2 (OK) | |||
Epilogue 3DS Fan Club 2 HI.png|Fan Club 2 (Superb) | |||
Epilogue 3DS Figure Fighter 3 NG.png|[[Figure Fighter 3]] (Try Again) | |||
Epilogue 3DS Figure Fighter 3 OK.png|Figure Fighter 3 (OK) | |||
Epilogue 3DS Figure Fighter 3 HI.png|Figure Fighter 3 (Superb) | |||
Epilogue 3DS Jungle Gymnast NG.png|[[Jungle Gymnast]] (Try Again) | |||
Epilogue 3DS Jungle Gymnast OK.png|Jungle Gymnast (OK) | |||
Epilogue 3DS Jungle Gymnast HI.png|Jungle Gymnast (Superb) | |||
Epilogue 3DS Left-Hand Remix NG.png|[[Left-Hand Remix]] (Try Again) | |||
Epilogue 3DS Left-Hand Remix OK.png|Left-Hand Remix (OK) | |||
Epilogue 3DS Left-Hand Remix HI.png|Left-Hand Remix (Superb) | |||
</gallery> | |||
;Right-Hand Tower | ;Right-Hand Tower | ||
<gallery perrow=3> | |||
Epilogue 3DS Tap Trial 2 NG.png|[[Tap Trial 2]] (Try Again) | |||
Epilogue 3DS Tap Trial 2 OK.png|Tap Trial 2 (OK) | |||
Epilogue 3DS Tap Trial 2 HI.png|Tap Trial 2 (Superb) | |||
Epilogue 3DS Jumpin' Jazz NG.png|[[Jumpin' Jazz]] (Try Again) | |||
Epilogue 3DS Jumpin' Jazz OK.png|Jumpin' Jazz (OK) | |||
Epilogue 3DS Jumpin' Jazz HI.png|Jumpin' Jazz (Superb) | |||
Epilogue 3DS Hole in One 2 NG.png|[[Hole in One 2]] (Try Again) | |||
Epilogue 3DS Hole in One 2 OK.png|Hole in One 2 (OK) | |||
Epilogue 3DS Hole in One 2 HI.png|Hole in One 2 (Superb) | |||
Epilogue 3DS Super Samurai Slice 2 NG.png|[[Super Samurai Slice 2]] (Try Again) | |||
Epilogue 3DS Super Samurai Slice 2 OK.png|Super Samurai Slice 2 (OK) | |||
Epilogue 3DS Super Samurai Slice 2 HI.png|Super Samurai Slice 2 (Superb) | |||
Epilogue 3DS Right-Hand Remix NG.png|[[Right-Hand Remix]] (Try Again) | |||
Epilogue 3DS Right-Hand Remix OK.png|Right-Hand Remix (OK) | |||
Epilogue 3DS Right-Hand Remix HI.png|Right-Hand Remix (Superb) | |||
</gallery> | |||
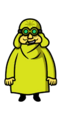
;Tibby's Mom | ;Tibby's Mom | ||
<gallery perrow=3> | |||
Epilogue 3DS Cosmic Dance NG.png|[[Cosmic Dance]] (Try Again) | |||
Epilogue 3DS Cosmic Dance OK.png|Cosmic Dance (OK) | |||
Epilogue 3DS Cosmic Dance HI.png|Cosmic Dance (Superb) | |||
Epilogue 3DS Cosmic Rhythm Rally NG.png|[[Cosmic Rhythm Rally]] (Try Again) | |||
Epilogue 3DS Cosmic Rhythm Rally OK.png|Cosmic Rhythm Rally (OK) | |||
Epilogue 3DS Cosmic Rhythm Rally HI.png|Cosmic Rhythm Rally (Superb) | |||
Epilogue 3DS Working Dough 2 NG.png|[[Working Dough 2]] (Try Again) | |||
Epilogue 3DS Working Dough 2 OK.png|Working Dough 2 (OK) | |||
Epilogue 3DS Working Dough 2 HI.png|Working Dough 2 (Superb) | |||
Epilogue 3DS Karate Man Senior NG.png|[[Karate Man Senior]] (Try Again) | |||
Epilogue 3DS Karate Man Senior OK.png|Karate Man Senior (OK) | |||
Epilogue 3DS Karate Man Senior HI.png|Karate Man Senior (Superb) | |||
Epilogue 3DS Final Remix NG.png|[[Final Remix]] (Try Again) | |||
Epilogue 3DS Final Remix OK.png|Final Remix (OK) | |||
Epilogue 3DS Final Remix HI.png|Final Remix (Superb) | |||
</gallery> | |||
;Shop No. 1 | ;Shop No. 1 | ||
<gallery perrow=3> | |||
Epilogue 3DS Bouncy Road NG.png|[[Bouncy Road]] (Try Again) | |||
Epilogue 3DS Bouncy Road OK.png|Bouncy Road (OK) | |||
Epilogue 3DS Bouncy Road HI.png|Bouncy Road (Superb) | |||
Epilogue 3DS Night Walk NG.png|[[Night Walk]] (Try Again) | |||
Epilogue 3DS Night Walk OK.png|Night Walk (OK) | |||
Epilogue 3DS Night Walk HI.png|Night Walk (Superb) | |||
Epilogue 3DS Quiz Show NG.png|[[Quiz Show]] (Try Again) | |||
Epilogue 3DS Quiz Show OK.png|Quiz Show (OK) | |||
Epilogue 3DS Quiz Show HI.png|Quiz Show (Superb) | |||
</gallery> | |||
;Shop No. 2 | ;Shop No. 2 | ||
<gallery perrow=3> | |||
Epilogue 3DS The Dazzles NG.png|[[The Dazzles]] (Try Again) | |||
Epilogue 3DS The Dazzles OK.png|The Dazzles (OK) | |||
Epilogue 3DS The Dazzles HI.png|The Dazzles (Superb) | |||
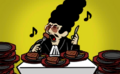
Epilogue 3DS Big Rock Finish NG.png|[[Big Rock Finish]] (Try Again) | |||
Epilogue 3DS Big Rock Finish OK.png|Big Rock Finish (OK) | |||
Epilogue 3DS Big Rock Finish HI.png|Big Rock Finish (Superb) | |||
Epilogue 3DS Karate Man Kicks! NG.png|[[Karate Man Kicks!]] (Try Again) | |||
Epilogue 3DS Karate Man Kicks! OK.png|Karate Man Kicks! (OK) | |||
Epilogue 3DS Karate Man Kicks! HI.png|Karate Man Kicks! (Superb) | |||
</gallery> | |||
;Shop No. 3 | ;Shop No. 3 | ||
<gallery perrow=3> | |||
Epilogue 3DS Built to Scale NG.png|[[Built to Scale]] (Try Again) | |||
Epilogue 3DS Built to Scale OK.png|Built to Scale (OK) | |||
Epilogue 3DS Built to Scale HI.png|Built to Scale (Superb) | |||
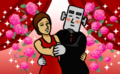
Epilogue 3DS Double Date NG.png|[[Double Date]] (Try Again) | |||
Epilogue 3DS Double Date OK.png|Double Date (OK) | |||
Epilogue 3DS Double Date HI.png|Double Date (Superb) | |||
Epilogue 3DS Catch of the Day NG.png|[[Catch of the Day]] (Try Again) | |||
Epilogue 3DS Catch of the Day OK.png|Catch of the Day (OK) | |||
Epilogue 3DS Catch of the Day HI.png|Catch of the Day (Superb) | |||
</gallery> | |||
;Shop No. 4 | ;Shop No. 4 | ||
<gallery perrow=3> | |||
Epilogue 3DS Fork Lifter NG.png|[[Fork Lifter]] (Try Again) | |||
Epilogue 3DS Fork Lifter OK.png|Fork Lifter (OK) | |||
Epilogue 3DS Fork Lifter HI.png|Fork Lifter (Superb) | |||
Epilogue 3DS Love Rap NG.png|[[Love Rap]] (Try Again) | |||
Epilogue 3DS Love Rap OK.png|Love Rap (OK) | |||
Epilogue 3DS Love Rap HI.png|Love Rap (Superb) | |||
Epilogue 3DS Bossa Nova NG.png|[[Bossa Nova]] (Try Again) | |||
Epilogue 3DS Bossa Nova OK.png|Bossa Nova (OK) | |||
Epilogue 3DS Bossa Nova HI.png|Bossa Nova (Superb) | |||
</gallery> | |||
;Shop No. 5 | ;Shop No. 5 | ||
<gallery perrow=3> | |||
Epilogue 3DS Screwbot Factory NG.png|[[Screwbot Factory]] (Try Again) | |||
Epilogue 3DS Screwbot Factory OK.png|Screwbot Factory (OK) | |||
Epilogue 3DS Screwbot Factory HI.png|Screwbot Factory (Superb) | |||
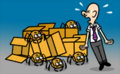
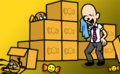
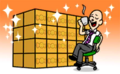
Epilogue 3DS Board Meeting NG.png|[[Board Meeting]] (Try Again) | |||
Epilogue 3DS Board Meeting OK.png|Board Meeting (OK) | |||
Epilogue 3DS Board Meeting HI.png|Board Meeting (Superb) | |||
Epilogue 3DS Samurai Slice NG.png|[[Samurai Slice]] (Try Again) | |||
Epilogue 3DS Samurai Slice OK.png|Samurai Slice (OK) | |||
Epilogue 3DS Samurai Slice HI.png|Samurai Slice (Superb) | |||
</gallery> | |||
;Shop No. 6 | ;Shop No. 6 | ||
<gallery perrow=3> | |||
Epilogue 3DS Packing Pests NG.png|[[Packing Pests]] (Try Again) | |||
Epilogue 3DS Packing Pests OK.png|Packing Pests (OK) | |||
Epilogue 3DS Packing Pests HI.png|Packing Pests (Superb) | |||
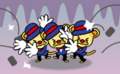
Epilogue 3DS Monkey Watch NG.png|[[Monkey Watch]] (Try Again) | |||
Epilogue 3DS Monkey Watch OK.png|Monkey Watch (OK) | |||
Epilogue 3DS Monkey Watch HI.png|Monkey Watch (Superb) | |||
Epilogue 3DS Karate Man Combos! NG.png|[[Karate Man Combos!]] (Try Again) | |||
Epilogue 3DS Karate Man Combos! OK.png|Karate Man Combos! (OK) | |||
Epilogue 3DS Karate Man Combos! HI.png|Karate Man Combos! (Superb) | |||
</gallery> | |||
==Screenshots== | ==Screenshots== | ||
===Prologues=== | ===Prologues=== | ||
Revision as of 00:10, 27 July 2025
|
This is a gallery of images covering the game Rhythm Heaven Megamix.
Logos
Rhythm Tengoku: The Best+ logo (.svg version)

Rhythm Heaven Megamix logo
Rhythm Heaven Megamix logo (.svg version)
Rhythm Paradise Megamix logo (.svg version)
Rhythm Paradise Megamix alternate logo (.svg version)

Rhythm Sesang: The Best Plus logo

Rhythm Sesang: The Best Plus logo (.svg version)
Rhythm Tengoku: The Uta Matsuri+ logo (.svg version)


Artwork
Characters
Story Characters


- The Gatekeeper Trio
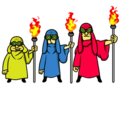
Group artwork

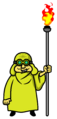
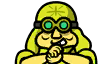
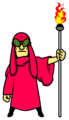
Saffron
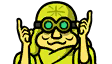


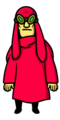
Saltwater


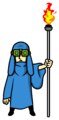
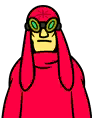
Paprika
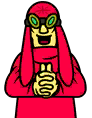


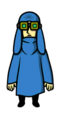
International releases
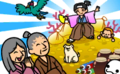
Japanese release


- Other Characters


Rhythm Games


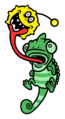
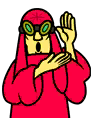
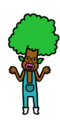
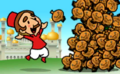
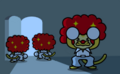
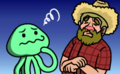
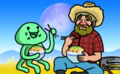
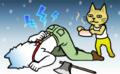
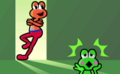
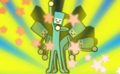
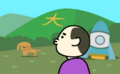
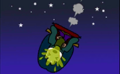
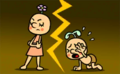
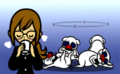
Chameleon and a bug (Tongue Lashing)
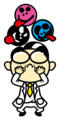
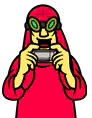
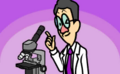
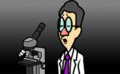
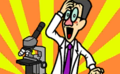
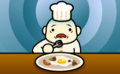
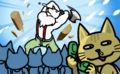
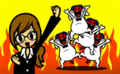
Sick Beats Doctor and Viruses (Sick Beats)


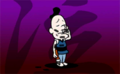
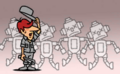
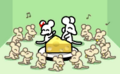
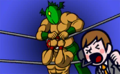
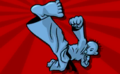
Karate Joe (Karate Man Returns!)
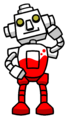
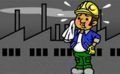
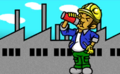
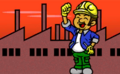
ROBO M (Fillbots 2)
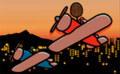
Baxter & Forthington (Air Rally 2)
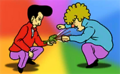
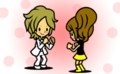
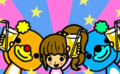
Plalin and Alalin (Catchy Tune 2)
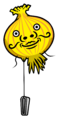
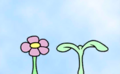
Harry Onion (Rhythm Tweezers 2)
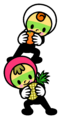
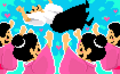
The Chorus Kids (Glee Club 2)
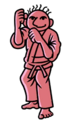
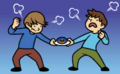
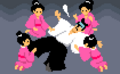
Muscle Doll (Figure Fighter 2)

Courtney (Fruit Basket 2)
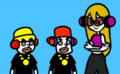
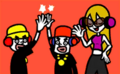
The Clappy Trio (The Clappy Trio 2)
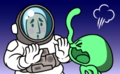
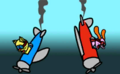
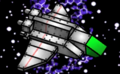
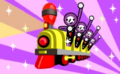
Blastronaut (Shoot-'em-up 2)
Microbes (Micro-Row 2)

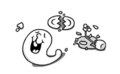
Sneaky Spirits (Sneaky Spirits 2)
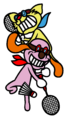
The Paddler (Rhythm Rally 2)
Flippers (Flipper-Flop 2)
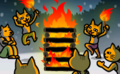
Lumbercats (LumBEARjack 2)
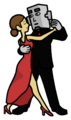
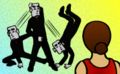
Tangotronic and his dance partner (Tangotronic 3000)


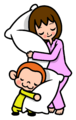
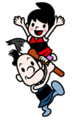
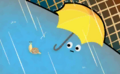
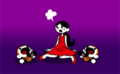
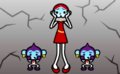
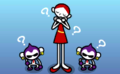
Mako and a Monkey (Pajama Party)


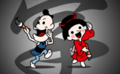
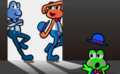
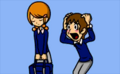
The Snappy Trio (The Snappy Trio)
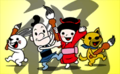
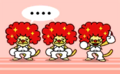
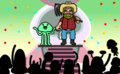
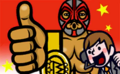
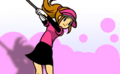
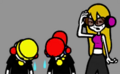
Pop Singer (Fan Club 2)

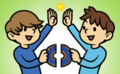
Muscle Doll (Figure Fighter 3)
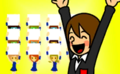
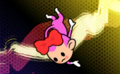
Left-Hand Remix (post-game)
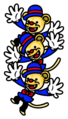
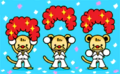
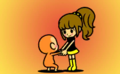
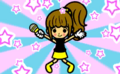
Girl and Monkeys (Tap Trial 2)

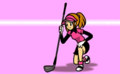
Lady Golfer (Hole in One 2)
Right-Hand Remix (post-game)

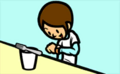
Dough Dudes (Working Dough 2)
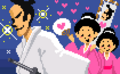
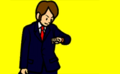
Karate Joe's Father (Karate Man Senior)

Final Remix (post-game)


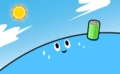
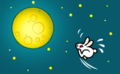
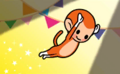
Play-Yan and Stars (Night Walk)
Karate Joe (Karate Man Kicks!)
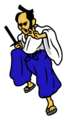
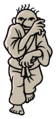
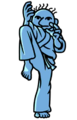
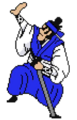
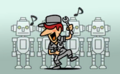
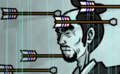
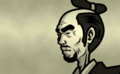
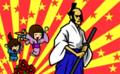
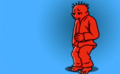
The Wandering Samurai (Samurai Slice)
Karate Joe (Karate Man Combos!)


- To sort

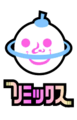
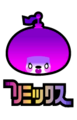
Martian
Mini Chōnin in Rhythm Sesang: The Best Plus
Ninja in Rhythm Sesang: The Best Plus
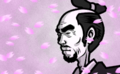
The Wandering Samurai in Rhythm Sesang: The Best Plus

The Wandering Samurai in Rhythm Sesang: The Best Plus

Lush Remix in Rhythm Tengoku: The Best+

Honeybee Remix in Rhythm Tengoku: The Best+

Machine Remix in Rhythm Tengoku: The Best+

Citrus Remix in Rhythm Tengoku: The Best+

Donut Remix in Rhythm Tengoku: The Best+

Barbershop Remix in Rhythm Tengoku: The Best+

Songbird Remix in Rhythm Tengoku: The Best+

Left-Hand Remix in Rhythm Tengoku: The Best+

Left-Hand Remix in Rhythm Tengoku: The Best+ (post-game)
Right-Hand Remix in Rhythm Tengoku: The Best+

Right-Hand Remix in Rhythm Tengoku: The Best+ (post-game)
Final Remix in Rhythm Tengoku: The Best+

Final Remix in Rhythm Tengoku: The Best+ (post-game)


Miscellaneous
Rhythm Heaven Megamix Costumed Tebiri Nintendo 3DS Theme

Costumed Tibby (Harry Onion)

Costumed Tibby (Slugger)

Costumed Tibby (Muscle Doll)

Costumed Tibby (Golfer)

Costumed Tibby (The Wandering Samurai)

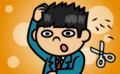
Costumed Tibby (Translator Tom)

Costumed Tibby (Karate Joe)

Costumed Tibby (Karate Joe)

Costumed Tibby (Karate Joe)


Rhythm Tengoku: The Best+ eManual

Tibby demonstrating Buttons mode

Tibby demonstrating Simple Tap mode


Promotional Art
Tibby and Mako
Tibby and Tsunku♂

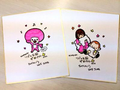
2016 new year card from Nintendo DREAM
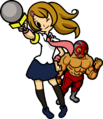
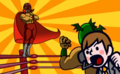
Reporter & Wrestler (Wallpaper artwork from Nintendo of Japan's website)
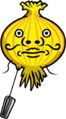
Harry Onion (LINE wallpaper artwork)
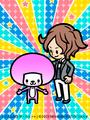
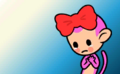
Pop Singer (LINE wallpaper artwork)
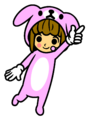
Monkey (LINE wallpaper artwork)


Sprites
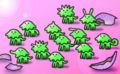
Icons
- Honeybee Land


- Machine Land


- The First Gate

- Citrus Land


- Donut Land


- The Second Gate

- Barbershop Land


- Songbird Land


- The Third Gate

- Lush Tower


- Honeybee Tower


- Machine Tower


- Citrus Tower


- Donut Tower


- Barbershop Tower


- Songbird Tower


- Star Land


- Comet Land


- Planet Land


- The Fourth Gate

- Left-Hand Tower


- Right-Hand Tower


- Tibby's Mom


- Shop No. 1


- Shop No. 2


- Shop No. 3


- Shop No. 4


- Shop No. 5


- Shop No. 6


Epilogues
- Honeybee Land
Karate Man (Try Again)
Karate Man (OK)
Karate Man (Superb)
Fillbots (Try Again)
Fillbots (OK)
Fillbots (Superb)
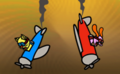
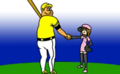
Air Rally (Try Again)
Air Rally (OK)
Air Rally (Superb)
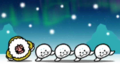
Catchy Tune (Try Again)
Catchy Tune (OK)
Catchy Tune (Superb)


- Machine Land
Rhythm Tweezers (Try Again)
Rhythm Tweezers (OK)
Rhythm Tweezers (Superb)
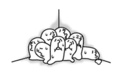
Glee Club (Try Again)
Glee Club (OK)
Glee Club (Superb)
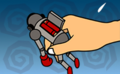
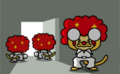
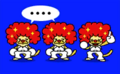
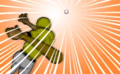
Figure Fighter (Try Again)
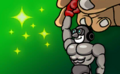
Figure Fighter (OK)
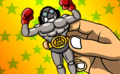
Figure Fighter (Superb)

Fruit Basket (Try Again)
Fruit Basket (OK)
Fruit Basket (Superb)


- Citrus Land
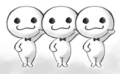
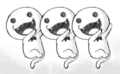
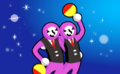
The Clappy Trio (Try Again)
The Clappy Trio (OK)
The Clappy Trio (Superb)
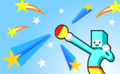
Shoot-'em-up (Try Again)
Shoot-'em-up (OK)
Shoot-'em-up (Superb)
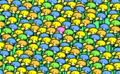
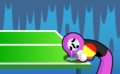
Micro-Row (Try Again)
Micro-Row (OK)

Micro-Row (Superb)
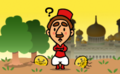
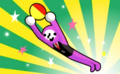
First Contact (Try Again)

First Contact (OK)

First Contact (Superb)


- Donut Land
Bunny Hop (Try Again)

Bunny Hop (OK)
Bunny Hop (Superb)
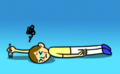
Airboarder (Try Again)
Airboarder (OK)
Airboarder (Superb)
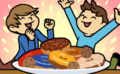
Exhibition Match (Try Again)
Exhibition Match (OK)
Exhibition Match (Superb)
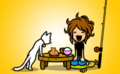
Tongue Lashing (Try Again)
Tongue Lashing (OK)
Tongue Lashing (Superb)


- Barbershop Land
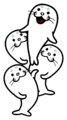
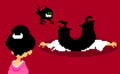
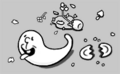
Sneaky Spirits (Try Again)
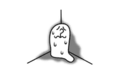
Sneaky Spirits (OK)
Sneaky Spirits (Superb)

Rhythm Rally (Try Again)
Rhythm Rally (OK)
Rhythm Rally (Superb)
Flipper-Flop (Try Again)
Flipper-Flop (OK)
Flipper-Flop (Superb)
LumBEARjack (Try Again)
LumBEARjack (OK)
LumBEARjack (Superb)


- Songbird Land
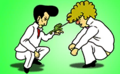
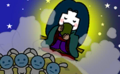
Power Calligraphy (Try Again)
Power Calligraphy (OK)
Power Calligraphy (Superb)
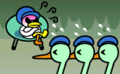
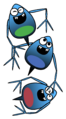
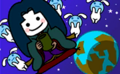
Blue Birds (Try Again)
Blue Birds (OK)
Blue Birds (Superb)
Flock Step (Try Again)
Flock Step (OK)
Flock Step (Superb)
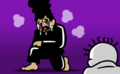
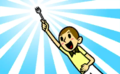
Super Samurai Slice (Try Again)
Super Samurai Slice (OK)

Super Samurai Slice (Superb)


- Lush Tower
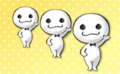
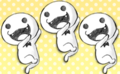
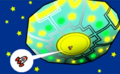
Spaceball (Try Again)
Spaceball (OK)
Spaceball (Superb)
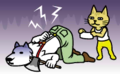
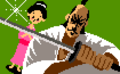
Dog Ninja (Try Again)
Dog Ninja (OK)
Dog Ninja (Superb)
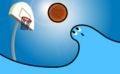
Hole in One (Try Again)
Hole in One (OK)
Hole in One (Superb)
Sumo Brothers (Try Again)
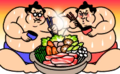
Sumo Brothers (OK)
Sumo Brothers (Superb)
Lush Remix (Try Again)

Lush Remix (OK)
Lush Remix (Superb)


- Honeybee Tower
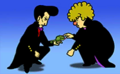
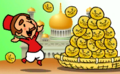
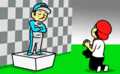
Karate Man Returns! (Try Again)
Karate Man Returns! (OK)
Karate Man Returns! (Superb)
Fillbots 2 (Try Again)
Fillbots 2 (OK)

Fillbots 2 (Superb)
Air Rally 2 (Try Again)
Air Rally 2 (OK)
Air Rally 2 (Superb)
Catchy Tune 2 (Try Again)
Catchy Tune 2 (OK)
Catchy Tune 2 (Superb)
Honeybee Remix (Try Again)
Honeybee Remix (OK)
Honeybee Remix (Superb)


- Machine Tower

Rhythm Tweezers 2 (Try Again)
Rhythm Tweezers 2 (OK)
Rhythm Tweezers 2 (Superb)
Glee Club 2 (Try Again)
Glee Club 2 (OK)
Glee Club 2 (Superb)
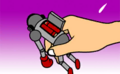
Figure Fighter 2 (Try Again)
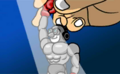
Figure Fighter 2 (OK)
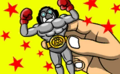
Figure Fighter 2 (Superb)
Fruit Basket 2 (Try Again)
Fruit Basket 2 (OK)

Fruit Basket 2 (Superb)
Machine Remix (Try Again)
Machine Remix (OK)
Machine Remix (Superb)


- Citrus Tower
The Clappy Trio 2 (Try Again)
The Clappy Trio 2 (OK)
The Clappy Trio 2 (Superb)
Shoot-'em-up 2 (Try Again)
Shoot-'em-up 2 (OK)
Shoot-'em-up 2 (Superb)
Micro-Row 2 (Try Again)

Micro-Row 2 (OK)
Micro-Row 2 (Superb)
Second Contact (Try Again)
Second Contact (OK)
Second Contact (Superb)
Citrus Remix (Try Again)
Citrus Remix (OK)
Citrus Remix (Superb)


- Donut Tower
Rat Race (Try Again)
Rat Race (OK)
Rat Race (Superb)
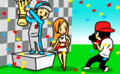
Fan Club (Try Again)
Fan Club (OK)
Fan Club (Superb)
Working Dough (Try Again)
Working Dough (OK)
Working Dough (Superb)
Animal Acrobat (Try Again)
Animal Acrobat (OK)
Animal Acrobat (Superb)
Donut Remix (Try Again)
Donut Remix (OK)
Donut Remix (Superb)


- Barbershop Tower
Sneaky Spirits 2 (Try Again)
Sneaky Spirits 2 (OK)

Sneaky Spirits 2 (Superb)
Rhythm Rally 2 (Try Again)
Rhythm Rally 2 (OK)
Rhythm Rally 2 (Superb)
Flipper-Flop 2 (Try Again)
Flipper-Flop 2 (OK)

Flipper-Flop 2 (Superb)
LumBEARjack 2 (Try Again)
LumBEARjack 2 (OK)
LumBEARjack 2 (Superb)

Barbershop Remix (Try Again)
Barbershop Remix (OK)

Barbershop Remix (Superb)


- Songbird Tower
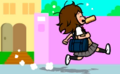
Tap Trial (Try Again)

Tap Trial (OK)
Tap Trial (Superb)
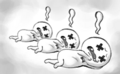
![[Frog Hop[]] (Try Again)](/w/images/thumb/0/07/Epilogue_3DS_Frog_Hop_NG.png/120px-Epilogue_3DS_Frog_Hop_NG.png)
[Frog Hop[]] (Try Again)
Frog Hop (OK)
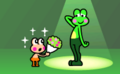
Frog Hop (Superb)
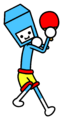
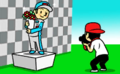
Ringside (Try Again)
Ringside (OK)
Ringside (Superb)
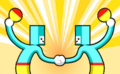
Tangotronic 3000 (Try Again)
Tangotronic 3000 (OK)
Tangotronic 3000 (Superb)
Songbird Remix (Try Again)
Songbird Remix (OK)
Songbird Remix (Superb)


![[Frog Hop[]] (Try Again)](/wiki/File:Epilogue_3DS_Frog_Hop_NG.png)


- Star Land
Ninja Bodyguard (Try Again)
Ninja Bodyguard (OK)
Ninja Bodyguard (Superb)
Freeze Frame (Try Again)
Freeze Frame (OK)
Freeze Frame (Superb)
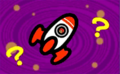
Launch Party (Try Again)

Launch Party (OK)
Launch Party (Superb)
Pajama Party (Try Again)
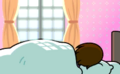
Pajama Party (OK)

Pajama Party (Superb)


- Comet Land
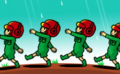
Marching Orders (Try Again)
Marching Orders (OK)
Marching Orders (Superb)
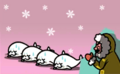
Munchy Monk (Try Again)
Munchy Monk (OK)
Munchy Monk (Superb)
See-Saw (Try Again)
See-Saw (OK)
See-Saw (Superb)

Blue Bear (Try Again)
Blue Bear (OK)
Blue Bear (Superb)


- Planet Land
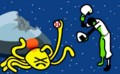
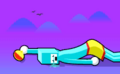
Space Dance (Try Again)
Space Dance (OK)
Space Dance (Superb)
Lockstep (Try Again)
Lockstep (OK)

Lockstep (Superb)

Cheer Readers (Try Again)
Cheer Readers (OK)
Cheer Readers (Superb)
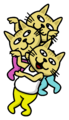
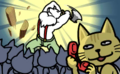
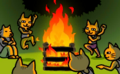
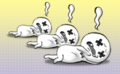
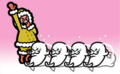
Kitties! (Try Again)

Kitties! (OK)
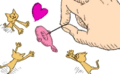
Kitties! (Superb)


- Left-Hand Tower
The Snappy Trio (Try Again)
The Snappy Trio (OK)
The Snappy Trio (Superb)
Fan Club 2 (Try Again)
Fan Club 2 (OK)
Fan Club 2 (Superb)

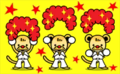
Figure Fighter 3 (Try Again)
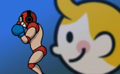
Figure Fighter 3 (OK)
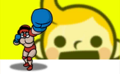
Figure Fighter 3 (Superb)
Jungle Gymnast (Try Again)
Jungle Gymnast (OK)
Jungle Gymnast (Superb)
Left-Hand Remix (Try Again)
Left-Hand Remix (OK)

Left-Hand Remix (Superb)


- Right-Hand Tower
Tap Trial 2 (Try Again)
Tap Trial 2 (OK)
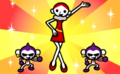
Tap Trial 2 (Superb)
Jumpin' Jazz (Try Again)
Jumpin' Jazz (OK)
Jumpin' Jazz (Superb)
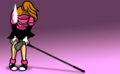
Hole in One 2 (Try Again)
Hole in One 2 (OK)
Hole in One 2 (Superb)
Super Samurai Slice 2 (Try Again)
Super Samurai Slice 2 (OK)
Super Samurai Slice 2 (Superb)

Right-Hand Remix (Try Again)
Right-Hand Remix (OK)
Right-Hand Remix (Superb)


- Tibby's Mom
Cosmic Dance (Try Again)
Cosmic Dance (OK)
Cosmic Dance (Superb)
Cosmic Rhythm Rally (Try Again)
Cosmic Rhythm Rally (OK)
Cosmic Rhythm Rally (Superb)
Working Dough 2 (Try Again)
Working Dough 2 (OK)
Working Dough 2 (Superb)
Karate Man Senior (Try Again)
Karate Man Senior (OK)
Karate Man Senior (Superb)
Final Remix (Try Again)
Final Remix (OK)
Final Remix (Superb)


- Shop No. 1

Bouncy Road (Try Again)
Bouncy Road (OK)
Bouncy Road (Superb)
Night Walk (Try Again)
Night Walk (OK)
Night Walk (Superb)
Quiz Show (Try Again)
Quiz Show (OK)
Quiz Show (Superb)


- Shop No. 2
The Dazzles (Try Again)
The Dazzles (OK)
The Dazzles (Superb)
Big Rock Finish (Try Again)
Big Rock Finish (OK)
Big Rock Finish (Superb)
Karate Man Kicks! (Try Again)

Karate Man Kicks! (OK)
Karate Man Kicks! (Superb)


- Shop No. 3
Built to Scale (Try Again)
Built to Scale (OK)
Built to Scale (Superb)
Double Date (Try Again)
Double Date (OK)
Double Date (Superb)
Catch of the Day (Try Again)
Catch of the Day (OK)

Catch of the Day (Superb)


- Shop No. 4
Fork Lifter (Try Again)
Fork Lifter (OK)

Fork Lifter (Superb)
Love Rap (Try Again)
Love Rap (OK)
Love Rap (Superb)
Bossa Nova (Try Again)
Bossa Nova (OK)
Bossa Nova (Superb)


- Shop No. 5
Screwbot Factory (Try Again)
Screwbot Factory (OK)
Screwbot Factory (Superb)
Board Meeting (Try Again)

Board Meeting (OK)
Board Meeting (Superb)
Samurai Slice (Try Again)
Samurai Slice (OK)
Samurai Slice (Superb)


- Shop No. 6
Packing Pests (Try Again)
Packing Pests (OK)
Packing Pests (Superb)
Monkey Watch (Try Again)
Monkey Watch (OK)
Monkey Watch (Superb)
Karate Man Combos! (Try Again)
Karate Man Combos! (OK)

Karate Man Combos! (Superb)


Screenshots
Prologues
- Honeybee Land


- Machine Land


- The First Gate

- Citrus Land


- Donut Land


- The Second Gate

- Barbershop Land


- Songbird Land


- The Third Gate

- Lush Tower


- Honeybee Tower


- Machine Tower


- Citrus Tower


- Donut Tower


- Barbershop Tower


- Songbird Tower


- Star Land


- Comet Land


- Planet Land


- The Fourth Gate

- Left-Hand Tower


- Right-Hand Tower


- Tibby's Mom


- Shop No. 1


- Shop No. 2


- Shop No. 3


- Shop No. 4


- Shop No. 5


- Shop No. 6


Rhythm Games
- Honeybee Land
- Machine Land
- The First Gate
- Citrus Land
- Donut Land
- The Second Gate
- Barbershop Land
- Songbird Land
- The Third Gate
- Lush Tower
- Honeybee Tower
- Machine Tower
- Citrus Tower
- Donut Tower
- Barbershop Tower
- Songbird Tower
- Star Land
- Comet Land
- Planet Land
- The Fourth Gate
- Left-Hand Tower
- Right-Hand Tower
- Tibby's Mom
- Shop No. 1
- Shop No. 2
- Shop No. 3
- Shop No. 4
- Shop No. 5
- Shop No. 6
- Miscellaneous
Box Art

Rhythm Tengoku: The Best+ boxart

Rhythm Paradise Megamix boxart

Rhythm Sesang: The Best Plus boxart

Rhythm Sesang: The Best Plus boxart (Nintendo Selects line)


Miscellaneous
- Other
- Rhythm Heaven Nintendo DREAM stickers.jpg
Nintendo DREAM #300 stickers
- Rhythm Tengoku The Best+ pouch.jpg
Rhythm Tengoku: The Best+ pre-order pouch
Galleries
| |
|---|---|
|