Gallery:Rhythm Heaven Fever: Difference between revisions
TheJoeMaster (talk | contribs) (→Artwork: consistency, then. Pls) |
TheJoeMaster (talk | contribs) m (→Sprites) |
||
| (76 intermediate revisions by 7 users not shown) | |||
| Line 1: | Line 1: | ||
This is a gallery of images covering the game ''[[Rhythm Heaven Fever]]''. | This is a gallery of images covering the game ''[[Rhythm Heaven Fever]]''. | ||
==Logos== | ==Logos== | ||
| Line 16: | Line 15: | ||
Artwork Wii Flipper-Flop A.png|[[Captain Tuck and the Flippers|Flippers]] ([[Flipper-Flop 2|Flipper-Flop]]) | Artwork Wii Flipper-Flop A.png|[[Captain Tuck and the Flippers|Flippers]] ([[Flipper-Flop 2|Flipper-Flop]]) | ||
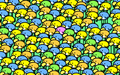
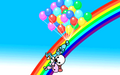
Artwork Wii Flock Step.png|[[Huebirds of Happiness]] ([[Flock Step]]) | Artwork Wii Flock Step.png|[[Huebirds of Happiness]] ([[Flock Step]]) | ||
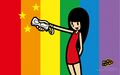
Artwork Wii Love Rap C.png|[[Love Posse feat. MC Adore]] ([[Love Rap]]) | Artwork Wii Love Rap C.png|[[Love Posse feat. MC Adore]] ([[Love Rap]]) | ||
Artwork Wii Tap Troupe A.png|[[The Tall Tappers]] ([[Tap Troupe]]) | Artwork Wii Tap Troupe A.png|[[The Tall Tappers]] ([[Tap Troupe]]) | ||
| Line 22: | Line 20: | ||
Artwork Wii Tap Troupe B.png|The Tall Tappers (Tap Troupe) | Artwork Wii Tap Troupe B.png|The Tall Tappers (Tap Troupe) | ||
Artwork Wii Tap Troupe B Alt.png|The Tall Tappers (Tap Troupe) | Artwork Wii Tap Troupe B Alt.png|The Tall Tappers (Tap Troupe) | ||
</gallery> | </gallery> | ||
===Characters=== | ===Characters=== | ||
;[[Rhythm Games]] | |||
<gallery> | <gallery> | ||
Artwork Wii Hole in One A.png|[[Monkey#Hole in One|Monkey]] ([[Hole in One]]) | Artwork Wii Hole in One A.png|[[Monkey#Hole in One|Monkey]] ([[Hole in One]]) | ||
Artwork Wii Hole in One B.png|Monkey (Hole in One) | Artwork Wii Hole in One B.png|Monkey (Hole in One) | ||
Artwork Wii Hole in One C.png|[[ | Artwork Wii Hole in One C.png|[[Mandrill]] (Hole in One) | ||
Artwork Wii Hole in One D.png|[[Golfer]] (Hole in One) | Artwork Wii Hole in One D.png|[[Golfer]] (Hole in One) | ||
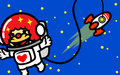
Artwork Wii Screwbot Factory A.png|[[Robots (Screwbot Factory)|Robot]] ([[Screwbot Factory]]) | Artwork Wii Screwbot Factory A.png|[[Robots (Screwbot Factory)|Robot]] ([[Screwbot Factory]]) | ||
| Line 54: | Line 32: | ||
Artwork Wii Screwbot Factory C.png|Robot (Screwbot Factory) | Artwork Wii Screwbot Factory C.png|Robot (Screwbot Factory) | ||
Artwork Wii Screwbot Factory D.png|Robot (Screwbot Factory) | Artwork Wii Screwbot Factory D.png|Robot (Screwbot Factory) | ||
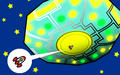
Artwork Wii See-Saw.png|[[See and Saw]] ([[See-Saw]]) | Artwork Wii See-Saw A.png|[[See and Saw]] ([[See-Saw]]) | ||
Artwork Wii See-Saw B.png|See and Saw (See-Saw) | |||
Artwork Wii See-Saw C.png|See and Saw (See-Saw) | |||
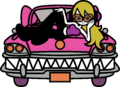
Artwork Wii Double Date.png|[[A Boy, His Crush, and Weasel Couple|His Crush]] ([[Double Date]]) | Artwork Wii Double Date.png|[[A Boy, His Crush, and Weasel Couple|His Crush]] ([[Double Date]]) | ||
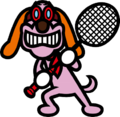
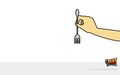
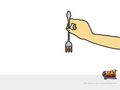
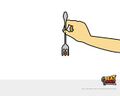
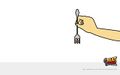
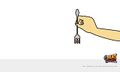
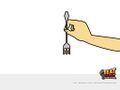
Artwork Wii Fork Lifter.png|[[Fork]] ([[Fork Lifter]]) | Artwork Wii Fork Lifter.png|[[Fork]] ([[Fork Lifter]]) | ||
| Line 80: | Line 60: | ||
Artwork Wii Samurai Slice KR.png|The Wandering Samurai (Samurai Slice 2 in ''Rhythm World Wii'') | Artwork Wii Samurai Slice KR.png|The Wandering Samurai (Samurai Slice 2 in ''Rhythm World Wii'') | ||
</gallery> | </gallery> | ||
;Other | |||
<gallery> | |||
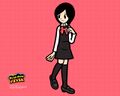
Artwork Wii Title Girl.png|[[Title]] Girl | |||
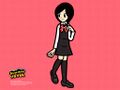
Artwork Wii Title Girl Alt.png|Title Girl | |||
Artwork Wii Title Girl BTB.png|Title Girl | |||
Artwork Wii Introduction.png|[[Introduction]] | |||
Artwork Wii Introduction A.png|Introduction | |||
Artwork Wii Introduction AB.png|Introduction | |||
Artwork Wii Marshal.png|[[Marshal, Cam, and Miss Ribbon|Marshal]] | |||
Artwork Wii Marshal Alt.png|Marshal | |||
Artwork Wii Marshal Manual.png|Marshal | |||
Artwork Wii Marshal BTB.png|Marshal | |||
Artwork Wii Cam.png|[[Marshal, Cam, and Miss Ribbon|Cam]] | |||
Artwork Wii Cam Alt.png|Cam | |||
Artwork Wii Cam BTB.png|Cam | |||
Artwork Wii Miss Ribbon.png|[[Marshal, Cam, and Miss Ribbon|Miss Ribbon]] | |||
Artwork Wii Miss Ribbon Alt.png|Miss Ribbon | |||
Artwork Wii Miss Ribbon BTB.png|Miss Ribbon | |||
</gallery> | |||
===Miscellaneous=== | |||
<gallery> | <gallery> | ||
Artwork Wii | Artwork Wii Vocal Dreams of Our Generation.png|[[Marshal, Cam, and Miss Ribbon]] (''[[Minna no Rhythm Tengoku Zen Kyoku-shu]]'') | ||
Artwork Wii Marshal CD.png|Marshal (''Minna no Rhythm Tengoku Zen Kyoku-shu'') | |||
Artwork Wii Cam CD.png|Cam (''Minna no Rhythm Tengoku Zen Kyoku-shu'') | Artwork Wii Cam CD.png|Cam (''Minna no Rhythm Tengoku Zen Kyoku-shu'') | ||
Artwork Wii Miss Ribbon CD.png|Miss Ribbon (''Minna no Rhythm Tengoku Zen Kyoku-shu'') | Artwork Wii Miss Ribbon CD.png|Miss Ribbon (''Minna no Rhythm Tengoku Zen Kyoku-shu'') | ||
Artwork Wii Vocal Tonight.png|[[generasia:Ogawa Mana|Mana Ogawa]] (''[[Minna no Rhythm Tengoku Zen Vocal-shu]]'') | Artwork Wii Vocal Tonight.png|[[generasia:Ogawa Mana|Mana Ogawa]] (''[[Minna no Rhythm Tengoku Zen Vocal-shu]]'') | ||
Artwork Wii Vocal Lonely Storm.png|[[ | Artwork Wii Vocal Lonely Storm.png|[[Soshi]] (''Minna no Rhythm Tengoku Zen Vocal-shu'') | ||
Artwork Wii Vocal Lonely Storm Alt.png| | Artwork Wii Vocal Lonely Storm Alt.png|Soshi (''Minna no Rhythm Tengoku Zen Vocal-shu'') | ||
Artwork Wii Vocal I Love You, My One and Only.png|[[generasia:Ciao Bella Cinquetti|THE POSSIBLE]] (''Minna no Rhythm Tengoku Zen Vocal-shu'') | |||
Artwork Wii Vocal Beautiful One Day.png|[[generasia:Canary Club|Canary CLUB]] (''Minna no Rhythm Tengoku Zen Vocal-shu'') | |||
</gallery> | </gallery> | ||
==Sprites== | ==Sprites== | ||
===Icons=== | ===Icons=== | ||
| Line 169: | Line 172: | ||
Game Wii 10-5 EU.png|Remix 10 (European) | Game Wii 10-5 EU.png|Remix 10 (European) | ||
</gallery> | </gallery> | ||
;Two-Player | ;[[Two-Player Menu]] | ||
<gallery> | <gallery> | ||
Game Wii P2-1.png|Fork Lifter | Game Wii P2-1.png|Fork Lifter | ||
| Line 180: | Line 183: | ||
Game Wii P2-8.png|Karate Man | Game Wii P2-8.png|Karate Man | ||
</gallery> | </gallery> | ||
; | ;[[Extra Games]] | ||
<gallery> | |||
Game Wii EX-1.gif|[[The Clappy Trio 2|The Clappy Trio]] | |||
Game Wii EX-2.gif|[[Sneaky Spirits 2|Sneaky Spirits]] | |||
Game Wii EX-3.gif|[[Power Calligraphy]] | |||
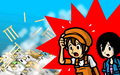
Game Wii EX-4.gif|[[Tap Trial]] | |||
</gallery> | |||
;[[Endless Games]] | |||
<gallery> | |||
Game Wii E-4.gif|[[Mr. Upbeat]] | |||
Game Wii E-1.gif|[[Wake-Up Caller]] | |||
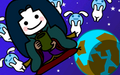
Game Wii E-2.gif|[[Munchy Monk (Wii)|Munchy Monk]] | |||
Game Wii E-3.gif|[[Lady Cupid]] | |||
Game Wii E-4 JP.gif|[[Manzai]] | |||
Game Wii E-5.gif|[[Endless Remix]] | |||
</gallery> | |||
;[[Two-Player Endless Games]] | |||
<gallery> | |||
Game Wii PE-1.gif|[[Clap Trap]] | |||
Game Wii PE-2.gif|[[Mochi Pounding]] | |||
Game Wii PE-3.gif|[[Kung Fu Ball]] | |||
Game Wii PE-4.gif|[[Pirate Crew]] | |||
Game Wii PE-5.gif|[[Bossa Nova (Endless Game)|Bossa Nova]] | |||
</gallery> | |||
;[[Rhythm Toys]] | |||
<gallery> | |||
Game Wii T-1.gif|[[Toy Car]] | |||
Game Wii T-2.gif|[[Police Call]] | |||
Game Wii T-3.gif|[[Hi-Hat]] | |||
Game Wii T-4.gif|[[Rhythm Fighter]] | |||
</gallery> | |||
;[[Medal Corner]] | |||
<gallery> | <gallery> | ||
Game Wii B-Hatena.png|Game Menu icon for menus in the Medal Corner that have not yet been unlocked | Game Wii B-Hatena.png|Game Menu icon for menus in the Medal Corner that have not yet been unlocked | ||
Game Wii B-1.png|[[Cafe]] | Game Wii B-1.png|[[Cafe]] | ||
| Line 192: | Line 224: | ||
Game Wii B2.png|[[Two-Player Endless Games]] | Game Wii B2.png|[[Two-Player Endless Games]] | ||
</gallery> | </gallery> | ||
;Miscellaneous | |||
<gallery> | |||
Game Wii Hatena.png|Game Menu icon for games that have not yet been unlocked | |||
Game Wii 7-4 Medal.png|[[Medal]] | |||
Game Wii 7-4 Perfect Medal.png|[[Perfect]] Medal | |||
Game Wii P2-8 Medal.png|[[Medal|Duo Medal]] | |||
</gallery> | |||
;Unused | |||
<gallery> | |||
Game Wii X.png|Unused Game Select icon | |||
</gallery> | |||
===Epilogues=== | ===Epilogues=== | ||
;Stage 1 | ;Stage 1 | ||
| Line 319: | Line 363: | ||
Epilogue Wii Remix 7 HI.png|Remix 7 (Superb) | Epilogue Wii Remix 7 HI.png|Remix 7 (Superb) | ||
</gallery> | </gallery> | ||
;Credits | ;Credits | ||
<gallery perrow=3> | <gallery perrow=3> | ||
Epilogue Wii Night Walk NG.png|[[Night Walk (Wii)|Night Walk]] (Try Again) | Epilogue Wii Night Walk NG.png|[[Night Walk (Wii)|Night Walk]] (Try Again) | ||
| Line 393: | Line 437: | ||
Epilogue Wii Tap Trial OK.png|Tap Trial (OK) | Epilogue Wii Tap Trial OK.png|Tap Trial (OK) | ||
Epilogue Wii Tap Trial HI.png|Tap Trial (Superb) | Epilogue Wii Tap Trial HI.png|Tap Trial (Superb) | ||
</gallery> | |||
===Characters=== | |||
;''Rhythm Heaven Fever'' Cast | |||
<gallery> | |||
Sprite Wii See-Saw Cast.png|[[See and Saw]] | |||
Sprite Wii Board Meeting Cast.png|[[Assistant]] | |||
Sprite Wii Working Dough Cast A.png|[[Dough Dudes]] | |||
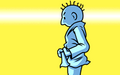
Sprite Wii Working Dough Cast B.png|[[Mr. Game & Watch]] | |||
Sprite Wii Packing Pests Cast.png|[[Treat Spider]] | |||
Sprite Wii Catch of the Day Cast A.png|[[Ann Glerr]] | |||
Sprite Wii Catch of the Day Cast B.png|[[Ann Glerr|Quicknibble, Pausegill, and Threefish]] | |||
Sprite Wii Exhibition Match Cast.png|[[Slugger]] | |||
Sprite Wii Donk-Donk Cast.png|[[Uh...these guys?]] | |||
</gallery> | |||
;Other | |||
<gallery> | |||
Sprite Wii Screwbot Factory.png|[[Robots (Screwbot Factory)|Robots]] | |||
Sprite Wii Double Date.png|[[Weasel Couple]] | |||
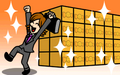
Sprite Wii Board Meeting.png|[[The Executives|Executive]] | |||
Sprite Wii Working Dough Animated.gif|[[Mr. Game & Watch]] | |||
Sprite Wii Working Dough Remix 3 Animated.gif|Mr. Game & Watch | |||
Sprite Wii Ringside Reporter.png|[[Reporter]] | |||
Sprite Wii Packing Pests.png|[[Treat Spider]] | |||
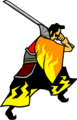
Sprite Wii Samurai Slice Samurai.png|[[The Wandering Samurai]] ([[Samurai Slice]]) | |||
Sprite Wii Samurai Slice A.png|[[Pinwheel Girl|Children]] | |||
Sprite Wii Samurai Slice KR.png|[[Pinwheel Girl|Children]] (''Rhythm World Wii'') | |||
Sprite Wii Samurai Slice B.png|[[Pinwheel Girl]] | |||
Sprite Wii Samurai Slice Demon A.png|[[Demons|Demon]] | |||
Sprite Wii Samurai Slice Demon B.png|Demon | |||
Sprite Wii Samurai Slice Demon C.png|Demon | |||
Sprite Wii Samurai Slice Demon D.png|Demon | |||
Sprite Wii Samurai Slice Demon E.png|Demon | |||
Sprite Wii Samurai Slice Demon F.png|Demon | |||
Sprite Wii Ringside Remix 4.png|Reporter ([[Remix 4 (Wii)|Remix 4]]) | |||
Sprite Wii Catch of the Day A.png|[[Quicknibble]] | |||
Sprite Wii Catch of the Day B.png|Pausegill | |||
Sprite Wii Catch of the Day C.png|Threefish | |||
Sprite Wii Flipper-Flop.png|[[Captain Tuck]] | |||
Sprite Wii Exhibition Match A.png|[[Pitcher]] | |||
Sprite Wii Exhibition Match B.png|[[Slugger]] | |||
Sprite Wii Karate Man Karate Joe.png|[[Karate Joe]] ([[Karate Man Combos!|Karate Man]]) | |||
Sprite Wii Remix 7 Karate Joe.png|Karate Joe ([[Remix 7 (Wii)|Remix 7]]) | |||
Sprite Wii Samurai Slice 2 A.png|[[Bunny Man]] | |||
Sprite Wii Samurai Slice 2 B.png|[[Samurai Slice 2]] little girl | |||
Sprite Wii Samurai Slice 2 Samurai.png|The Wandering Samurai ([[Samurai Slice 2]]) | |||
Sprite Wii Samurai Slice 2 C.png|The Wandering Samurai (Samurai Slice 2) | |||
Sprite Wii Working Dough 2 Animated.gif|Mr. Game & Watch | |||
Sprite Wii Working Dough 2 A.png|[[Dough Dudes|Giant dough lady]] | |||
Sprite Wii Working Dough 2 B.png|[[Space-Rabbit]]s | |||
Sprite Wii Remix 8 Samurai.png|The Wandering Samurai ([[Remix 8 (Wii)|Remix 8]]) | |||
Sprite Wii Remix 9 Karate Joe.png|Karate Joe ([[Remix 9 (Wii)|Remix 9]]) | |||
Sprite Wii Karate Man Remix 9.png|[[Karate Joe#Other Appearances|Cat]] (Remix 9) | |||
Sprite Wii Board Meeting Remix 9.png|[[Assistant]] (Remix 9) | |||
Sprite Wii Karate Man 2 Karate Joe.png|[[Karate Joe]] ([[Karate Man 2 (Wii)|Karate Man 2]]) | |||
Sprite Wii Packing Pests Bouquet.png|[[Packing Pests]] bouquet ([[Remix 10 (Wii)|Remix 10]]) | |||
Sprite Wii Clappy Trio Lion.png|[[The Clappy Trio (characters)|Lion]] ([[The Clappy Trio 2|The Clappy Trio]]) | |||
Sprite Wii Sneaky Spirits Ghost.png|[[Sneaky Spirits (characters)|Sneaky Spirit]] ([[Sneaky Spirits 2|Sneaky Spirits]]) | |||
Sprite Wii Power Calligraphy.png|[[Mini Chōnin]] | |||
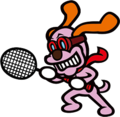
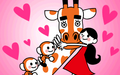
Sprite Wii Tap Trial A.png|[[Girl]] | |||
Sprite Wii Tap Trial B.png|[[Giraffe]] | |||
Sprite Wii Munchy Monk Chorus Kid.png|[[The Chorus Kids|Chorus Kid]] ([[Munchy Monk (Wii)|Munchy Monk]]) | |||
Sprite Wii Lady Cupid.png|[[Lady Cupid (character)|Lady Cupid]] | |||
Sprite Wii Manzai.png|[[Manzai|Ottorizu]] | |||
Sprite Wii Pirate Crew.png|[[Pirate Captain Jackie]] | |||
Sprite Wii Kung Fu Ball.png|[[Kung Fu Ball]] kappa | |||
</gallery> | </gallery> | ||
| Line 398: | Line 507: | ||
===Prologues=== | ===Prologues=== | ||
;Stage 1 | ;Stage 1 | ||
<gallery position="center" spacing="small"> | |||
Prologue Wii Hole in One.png|[[Hole in One]] | |||
Prologue Wii Screwbot Factory.png|[[Screwbot Factory]] | |||
Prologue Wii See-Saw.png|[[See-Saw]] | |||
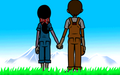
Prologue Wii Double Date.png|[[Double Date]] | |||
Prologue Wii Remix 1.png|[[Remix 1 (Wii)|Remix 1]] | |||
</gallery> | |||
;Stage 2 | ;Stage 2 | ||
<gallery position="center" spacing="small"> | |||
Prologue Wii Fork Lifter.png|[[Fork Lifter]] | |||
Prologue Wii Tambourine.png|[[Tambourine]] | |||
Prologue Wii Board Meeting.png|[[Board Meeting]] | |||
Prologue Wii Monkey Watch.png|[[Monkey Watch]] | |||
Prologue Wii Remix 2.png|[[Remix 2 (Wii)|Remix 2]] | |||
</gallery> | |||
;Stage 3 | ;Stage 3 | ||
<gallery position="center" spacing="small"> | |||
Prologue Wii Working Dough.png|[[Working Dough]] | |||
Prologue Wii Built to Scale.png|[[Built to Scale (Wii)|Built to Scale]] | |||
Prologue Wii Air Rally 2.png|[[Air Rally 2|Air Rally]] | |||
Prologue Wii Figure Fighter 2.png|[[Figure Fighter 2|Figure Fighter]] | |||
Prologue Wii Remix 3.png|[[Remix 3 (Wii)|Remix 3]] | |||
</gallery> | |||
;Stage 4 | ;Stage 4 | ||
<gallery position="center" spacing="small"> | |||
Prologue Wii Ringside.png|[[Ringside]] | |||
Prologue Wii Packing Pests.png|[[Packing Pests]] | |||
Prologue Wii Micro-Row 2.png|[[Micro-Row 2|Micro-Row]] | |||
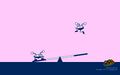
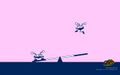
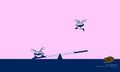
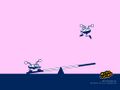
Prologue Wii Samurai Slice.png|[[Samurai Slice (Wii)|Samurai Slice]] | |||
Prologue Wii Remix 4.png|[[Remix 4 (Wii)|Remix 4]] | |||
</gallery> | |||
;Stage 5 | ;Stage 5 | ||
<gallery position="center" spacing="small"> | |||
Prologue Wii Catch of the Day.png|[[Catch of the Day]] | |||
Prologue Wii Flipper-Flop 2.png|[[Flipper-Flop 2|Flipper-Flop]] | |||
Prologue Wii Exhibition Match.png|[[Exhibition Match]] | |||
Prologue Wii Flock Step.png|[[Flock Step]] | |||
Prologue Wii Remix 5.png|[[Remix 5 (Wii)|Remix 5]] | |||
</gallery> | |||
;Stage 6 | ;Stage 6 | ||
<gallery position="center" spacing="small"> | |||
Prologue Wii Launch Party.png|[[Launch Party]] | |||
Prologue Wii Donk-Donk.png|[[Donk-Donk]] | |||
Prologue Wii Bossa Nova.png|[[Bossa Nova]] | |||
Prologue Wii Love Rap.png|[[Love Rap]] | |||
Prologue Wii Remix 6.png|[[Remix 6 (Wii)|Remix 6]] | |||
</gallery> | |||
;Stage 7 | ;Stage 7 | ||
<gallery position="center" spacing="small"> | |||
Prologue Wii Tap Troupe.png|[[Tap Troupe]] | |||
Prologue Wii Shrimp Shuffle.png|[[Shrimp Shuffle]] | |||
Prologue Wii Cheer Readers.png|[[Cheer Readers]] | |||
Prologue Wii Karate Man Combos!.png|[[Karate Man Combos!|Karate Man]] | |||
Prologue Wii Remix 7.png|[[Remix 7 (Wii)|Remix 7]] | |||
</gallery> | |||
;Credits Game | |||
<gallery position="center" spacing="small"> | |||
Prologue Wii Night Walk.png|[[Night Walk (Wii)|Night Walk]] | |||
</gallery> | |||
;Stage 8 | ;Stage 8 | ||
<gallery position="center" spacing="small"> | |||
Prologue Wii Samurai Slice 2.png|[[Samurai Slice 2]] | |||
Prologue Wii Working Dough 2.png|[[Working Dough 2]] | |||
Prologue Wii Built to Scale 2.png|[[Built to Scale 2 (Wii)|Built to Scale 2]] | |||
Prologue Wii Double Date 2.png|[[Double Date 2]] | |||
Prologue Wii Remix 8.png|[[Remix 8 (Wii)|Remix 8]] | |||
</gallery> | |||
;Stage 9 | ;Stage 9 | ||
<gallery position="center" spacing="small"> | |||
Prologue Wii Love Rap 2.png|[[Love Rap 2]] | |||
Prologue Wii Cheer Readers 2.png|[[Cheer Readers 2]] | |||
Prologue Wii Hole in One 2.png|[[Hole in One 2]] | |||
Prologue Wii Screwbot Factory 2.png|[[Screwbot Factory 2]] | |||
Prologue Wii Remix 9.png|[[Remix 9 (Wii)|Remix 9]] | |||
</gallery> | |||
;Stage 10 | ;Stage 10 | ||
===[[Rhythm Game]] | <gallery position="center" spacing="small"> | ||
Prologue Wii Figure Fighter 3.png|[[Figure Fighter 3|Figure Fighter 2]] | |||
Prologue Wii Micro-Row 2nd.png|[[Micro-Row 2 (Wii)|Micro-Row 2]] | |||
Prologue Wii Packing Pests 2.png|[[Packing Pests 2]] | |||
Prologue Wii Karate Man 2.png|[[Karate Man 2 (Wii)|Karate Man 2]] | |||
Prologue Wii Remix 10.png|[[Remix 10 (Wii)|Remix 10]] | |||
</gallery> | |||
;Two-Player Menu | |||
<gallery position="center" spacing="small"> | |||
Prologue Wii Fork Lifter Two Player.png|[[Fork Lifter#Two Player|Fork Lifter]] | |||
Prologue Wii Tambourine Two Player.png|[[Tambourine#Two Player|Tambourine]] | |||
Prologue Wii Ringside Two Player.png|[[Ringside#Two Player|Ringside]] | |||
Prologue Wii Micro-Row Two Player.png|[[Micro-Row 2#Two Player|Micro-Row]] | |||
Prologue Wii Flipper-Flop Two Player.png|[[Flipper-Flop 2#Two Player|Flipper-Flop]] | |||
Prologue Wii Launch Party Two Player.png|[[Launch Party#Two Player|Launch Party]] | |||
Prologue Wii Tap Troupe Two Player.png|[[Tap Troupe#Two Player|Tap Troupe]] | |||
Prologue Wii Karate Man Two Player.png|[[Karate Man Combos!#Two Player|Karate Man]] | |||
</gallery> | |||
;Extra Games | |||
<gallery position="center" spacing="small"> | |||
Prologue Wii The Clappy Trio 2.png|[[The Clappy Trio 2|The Clappy Trio]] | |||
Prologue Wii Sneaky Spirits 2.png|[[Sneaky Spirits 2|Sneaky Spirits]] | |||
Prologue Wii Power Calligraphy.png|[[Power Calligraphy]] | |||
Prologue Wii Tap Trial.png|[[Tap Trial]] | |||
</gallery> | |||
===[[Rhythm Game|Rhythm Games]]=== | |||
;Stage 1 | ;Stage 1 | ||
<gallery> | |||
Screenshot Wii Hole in One Practice.png|[[Hole in One]] ([[Practice]]) | |||
Screenshot Wii Hole in One.png|[[Hole in One]] | |||
Screenshot Wii Screwbot Factory.png|[[Screwbot Factory]] | |||
Screenshot Wii See-Saw.png|[[See-Saw]] | |||
Screenshot Wii Double Date Practice.png|[[Double Date]] ([[Practice]]) | |||
Screenshot Wii Double Date.png|[[Double Date]] | |||
Screenshot Wii Hole in One Remix 1 Intro.png|[[Remix 1 (Wii)|Remix 1]] ([[Hole in One]], [[Practice|Opening]]) | |||
Screenshot Wii Hole in One Remix 1.png|[[Remix 1 (Wii)|Remix 1]] ([[Hole in One]]) | |||
Screenshot Wii Screwbot Factory Remix 1.png|[[Remix 1 (Wii)|Remix 1]] ([[Screwbot Factory]]) | |||
Screenshot Wii Double Date Remix 1.png|[[Remix 1 (Wii)|Remix 1]] ([[Double Date]]) | |||
Screenshot Wii See-Saw Remix 1.png|[[Remix 1 (Wii)|Remix 1]] ([[See-Saw]]) | |||
</gallery> | |||
;Stage 2 | ;Stage 2 | ||
<gallery> | |||
Screenshot Wii Fork Lifter.png|[[Fork Lifter]] | |||
Screenshot Wii Tambourine.png|[[Tambourine]] | |||
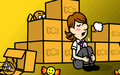
Screenshot Wii Board Meeting.png|[[Board Meeting]] | |||
Screenshot Wii Monkey Watch.png|[[Monkey Watch]] | |||
Screenshot Wii Monkey Watch Remix 2.png|[[Remix 2 (Wii)|Remix 2]] ([[Monkey Watch]]) | |||
Screenshot Wii Fork Lifter Remix 2.png|[[Remix 2 (Wii)|Remix 2]] ([[Fork Lifter]]) | |||
Screenshot Wii Board Meeting Remix 2.png|[[Remix 2 (Wii)|Remix 2]] ([[Board Meeting]]) | |||
Screenshot Wii Tambourine Remix 2.png|[[Remix 2 (Wii)|Remix 2]] ([[Tambourine]]) | |||
</gallery> | |||
;Stage 3 | ;Stage 3 | ||
<gallery> | |||
Screenshot Wii Working Dough Practice.png|[[Working Dough]] ([[Practice]]) | |||
Screenshot Wii Working Dough.png|[[Working Dough]] | |||
Screenshot Wii Built to Scale.png|[[Built to Scale (Wii)|Built to Scale]] | |||
Screenshot Wii Air Rally.png|[[Air Rally 2|Air Rally]] | |||
Screenshot Wii Figure Fighter Practice.png|[[Figure Fighter 2|Figure Fighter]] ([[Practice]]) | |||
Screenshot Wii Figure Fighter.png|[[Figure Fighter 2|Figure Fighter]] | |||
Screenshot Wii Working Dough Remix 3.png|[[Remix 3 (Wii)|Remix 3]] ([[Working Dough]]) | |||
Screenshot Wii Figure Fighter Remix 3.png|[[Remix 3 (Wii)|Remix 3]] ([[Figure Fighter 2|Figure Fighter]]) | |||
Screenshot Wii Built to Scale Remix 3.png|[[Remix 3 (Wii)|Remix 3]] ([[Built to Scale (Wii)|Built to Scale]]) | |||
Screenshot Wii Air Rally Remix 3.png|[[Remix 3 (Wii)|Remix 3]] ([[Air Rally 2|Air Rally]]) | |||
</gallery> | |||
;Stage 4 | ;Stage 4 | ||
<gallery> | |||
Screenshot Wii Ringside Practice.png|[[Ringside]] ([[Practice]]) | |||
Screenshot Wii Ringside.png|[[Ringside]] | |||
Screenshot Wii Packing Pests Practice.png|[[Packing Pests]] ([[Practice]]) | |||
Screenshot Wii Packing Pests.png|[[Packing Pests]] | |||
Screenshot Wii Micro-Row Practice.png|[[Micro-Row 2|Micro-Row]] ([[Practice]]) | |||
Screenshot Wii Micro-Row.png|[[Micro-Row 2|Micro-Row]] | |||
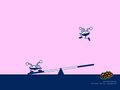
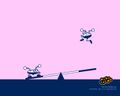
Screenshot Wii Samurai Slice Practice.png|[[Samurai Slice (Wii)|Samurai Slice]] ([[Practice]]) | |||
Screenshot Wii Samurai Slice.png|[[Samurai Slice (Wii)|Samurai Slice]] | |||
Screenshot Wii Samurai Slice Remix 4.png|[[Remix 4 (Wii)|Remix 4]] ([[Samurai Slice (Wii)|Samurai Slice]]) | |||
Screenshot Wii Ringside Remix 4.png|[[Remix 4 (Wii)|Remix 4]] ([[Ringside]]) | |||
Screenshot Wii Micro-Row Remix 4.png|[[Remix 4 (Wii)|Remix 4]] ([[Micro-Row 2|Micro-Row]]) | |||
Screenshot Wii Packing Pests Remix 4.png|[[Remix 4 (Wii)|Remix 4]] ([[Packing Pests]]) | |||
</gallery> | |||
;Stage 5 | ;Stage 5 | ||
<gallery> | |||
Screenshot Wii Catch of the Day.png|[[Catch of the Day]] | |||
Screenshot Wii Flipper-Flop.png|[[Flipper-Flop 2|Flipper-Flop]] | |||
Screenshot Wii Exhibition Match Practice.png|[[Exhibition Match]] ([[Practice]]) | |||
Screenshot Wii Exhibition Match.png|[[Exhibition Match]] | |||
Screenshot Wii Flock Step.png|[[Flock Step]] | |||
Screenshot Wii Catch of the Day Remix 5.png|[[Remix 5 (Wii)|Remix 5]] ([[Catch of the Day]]) | |||
Screenshot Wii Exhibition Match Remix 5.png|[[Remix 5 (Wii)|Remix 5]] ([[Exhibition Match]]) | |||
Screenshot Wii Flock Step Remix 5.png|[[Remix 5 (Wii)|Remix 5]] ([[Flock Step]]) | |||
Screenshot Wii Flipper-Flop Remix 5.png|[[Remix 5 (Wii)|Remix 5]] ([[Flipper-Flop 2|Flipper-Flop]]) | |||
</gallery> | |||
;Stage 6 | ;Stage 6 | ||
<gallery> | |||
Screenshot Wii Launch Party Practice.png|[[Launch Party]] ([[Practice]]) | |||
Screenshot Wii Launch Party.png|[[Launch Party]] | |||
Screenshot Wii Donk-Donk Practice.png|[[Donk-Donk]] ([[Practice]]) | |||
Screenshot Wii Donk-Donk.png|[[Donk-Donk]] | |||
Screenshot Wii Bossa Nova Practice.png|[[Bossa Nova]] ([[Practice]]) | |||
Screenshot Wii Bossa Nova.png|[[Bossa Nova]] | |||
Screenshot Wii Love Rap Practice.png|[[Love Rap]] ([[Practice]]) | |||
Screenshot Wii Love Rap.png|[[Love Rap]] | |||
Screenshot Wii Love Rap End.png|[[Love Rap]] (End) | |||
Screenshot Wii Love Rap Remix 6.png|[[Remix 6 (Wii)|Remix 6]] ([[Love Rap]]) | |||
Screenshot Wii Donk-Donk Remix 6.png|[[Remix 6 (Wii)|Remix 6]] ([[Donk-Donk]]) | |||
Screenshot Wii Bossa Nova Remix 6.png|[[Remix 6 (Wii)|Remix 6]] ([[Bossa Nova]]) | |||
Screenshot Wii Launch Party Remix 6.png|[[Remix 6 (Wii)|Remix 6]] ([[Launch Party]]) | |||
</gallery> | |||
;Stage 7 | ;Stage 7 | ||
<gallery> | |||
Screenshot Wii Tap Troupe.png|[[Tap Troupe]] | |||
Screenshot Wii Shrimp Shuffle.png|[[Shrimp Shuffle]] | |||
Screenshot Wii Cheer Readers Practice.png|[[Cheer Readers]] ([[Practice]]) | |||
Screenshot Wii Cheer Readers.png|[[Cheer Readers]] | |||
Screenshot Wii Karate Man.png|[[Karate Man Combos!|Karate Man]] | |||
Screenshot Wii Cheer Readers Remix 7.png|[[Remix 7 (Wii)|Remix 7]] ([[Cheer Readers]]) | |||
Screenshot Wii Karate Man Remix 7.png|[[Remix 7 (Wii)|Remix 7]] ([[Karate Man Combos!|Karate Man]]) | |||
Screenshot Wii Shrimp Shuffle Remix 7.png|[[Remix 7 (Wii)|Remix 7]] ([[Shrimp Shuffle]]) | |||
Screenshot Wii Tap Troupe Remix 7.png|[[Remix 7 (Wii)|Remix 7]] ([[Tap Troupe]]) | |||
Screenshot Wii Karate Man Remix 7 2.png|[[Remix 7 (Wii)|Remix 7]] ([[Karate Man Combos!|Karate Man]]) | |||
</gallery> | |||
;Credits Game | |||
<gallery> | |||
Screenshot Wii Night Walk.png|[[Night Walk (Wii)|Night Walk]] | |||
</gallery> | |||
;Stage 8 | ;Stage 8 | ||
<gallery> | |||
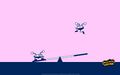
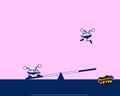
Screenshot Wii Samurai Slice 2.png|[[Samurai Slice 2]] | |||
Screenshot Wii Working Dough 2.png|[[Working Dough 2]] | |||
Screenshot Wii Built to Scale 2.png|[[Built to Scale 2 (Wii)|Built to Scale 2]] | |||
Screenshot Wii Double Date 2.png|[[Double Date 2]] | |||
Screenshot Wii Double Date Remix 8 Start.png|[[Remix 8 (Wii)|Remix 8]] ([[Double Date]]) | |||
Screenshot Wii Working Dough Remix 8.png|[[Remix 8 (Wii)|Remix 8]] ([[Working Dough]]) | |||
Screenshot Wii Built to Scale Remix 8.png|[[Remix 8 (Wii)|Remix 8]] ([[Built to Scale (Wii)|Built to Scale]]) | |||
Screenshot Wii Launch Party Remix 8.png|[[Remix 8 (Wii)|Remix 8]] ([[Launch Party]]) | |||
Screenshot Wii Exhibition Match Remix 8.png|[[Remix 8 (Wii)|Remix 8]] ([[Exhibition Match]]) | |||
Screenshot Wii Double Date Remix 8.png|[[Remix 8 (Wii)|Remix 8]] ([[Double Date]]) | |||
Screenshot Wii Air Rally Remix 8.png|[[Remix 8 (Wii)|Remix 8]] ([[Air Rally 2|Air Rally]]) | |||
Screenshot Wii Samurai Slice Remix 8.png|[[Remix 8 (Wii)|Remix 8]] ([[Samurai Slice (Wii)|Samurai Slice]]) | |||
</gallery> | |||
;Stage 9 | ;Stage 9 | ||
<gallery> | |||
Screenshot Wii Love Rap 2.png|[[Love Rap 2]] | |||
Screenshot Wii Love Rap 2 End.png|[[Love Rap 2]] (End) | |||
Screenshot Wii Cheer Readers 2.png|[[Cheer Readers 2]] | |||
Screenshot Wii Hole in One 2.png|[[Hole in One 2]] | |||
Screenshot Wii Screwbot Factory 2.png|[[Screwbot Factory 2]] | |||
Screenshot Wii Cheer Readers Remix 9.png|[[Remix 9 (Wii)|Remix 9]] ([[Cheer Readers]]) | |||
Screenshot Wii Love Rap Remix 9 ver1.png|[[Remix 9 (Wii)|Remix 9]] ([[Love Rap]]) | |||
Screenshot Wii Karate Man Remix 9 ver1.png|[[Remix 9 (Wii)|Remix 9]] ([[Karate Man Combos!|Karate Man]]) | |||
Screenshot Wii Fork Lifter Remix 9.png|[[Remix 9 (Wii)|Remix 9]] ([[Fork Lifter]]) | |||
Screenshot Wii Screwbot Factory Remix 9.png|[[Remix 9 (Wii)|Remix 9]] ([[Screwbot Factory]]) | |||
Screenshot Wii Board Meeting Remix 9.png|[[Remix 9 (Wii)|Remix 9]] ([[Board Meeting]]) | |||
Screenshot Wii Tambourine Remix 9.png|[[Remix 9 (Wii)|Remix 9]] ([[Tambourine]]) | |||
Screenshot Wii Hole in One Remix 9.png|[[Remix 9 (Wii)|Remix 9]] ([[Hole in One 2]]) | |||
Screenshot Wii Karate Man Remix 9 ver2.png|[[Remix 9 (Wii)|Remix 9]] ([[Karate Man Combos!|Karate Man]]) | |||
Screenshot Wii Karate Man Remix 9 ver3.png|[[Remix 9 (Wii)|Remix 9]] ([[Karate Man Combos!|Karate Man]]) | |||
Screenshot Wii Ringside Remix 9.png|[[Remix 9 (Wii)|Remix 9]] ([[Ringside]]) | |||
Screenshot Wii Love Rap Remix 9 ver2.png|[[Remix 9 (Wii)|Remix 9]] ([[Love Rap]]) | |||
Screenshot Wii Karate Man Remix 9 ver4.png|[[Remix 9 (Wii)|Remix 9]] ([[Karate Man Combos!|Karate Man]]) | |||
</gallery> | |||
;Stage 10 | ;Stage 10 | ||
<gallery> | |||
Screenshot Wii Figure Fighter 2.png|[[Figure Fighter 3|Figure Fighter 2]] | |||
Screenshot Wii Micro-Row 2 Practice.png|[[Micro-Row 2 (Wii)|Micro-Row 2]]<br>([[Practice]]) | |||
Screenshot Wii Micro-Row 2.png|[[Micro-Row 2 (Wii)|Micro-Row 2]] | |||
Screenshot Wii Packing Pests 2 Practice.png|[[Packing Pests 2]]<br>([[Practice]]) | |||
Screenshot Wii Packing Pests 2.png|[[Packing Pests 2]] | |||
Screenshot Wii Karate Man 2.png|[[Karate Man 2 (Wii)|Karate Man 2]] | |||
Screenshot Wii Double Date Remix 10.png|[[Remix 10 (Wii)|Remix 10]] ([[Double Date]]) | |||
Screenshot Wii Karate Man Remix 10.png|[[Remix 10 (Wii)|Remix 10]] ([[Karate Man Combos!|Karate Man]]) | |||
Screenshot Wii Packing Pests Remix 10.png|[[Remix 10 (Wii)|Remix 10]] ([[Packing Pests]]) | |||
</gallery> | |||
;Two-Player Menu | |||
<gallery position="center" spacing="small"> | |||
Screenshot Wii Fork Lifter Two Player.png|[[Fork Lifter#Two Player|Fork Lifter]] | |||
Screenshot Wii Tambourine Two Player.png|[[Tambourine#Two Player|Tambourine]] | |||
Screenshot Wii Ringside Two Player.png|[[Ringside#Two Player|Ringside]] | |||
Screenshot Wii Micro-Row Two Player.png|[[Micro-Row 2#Two Player|Micro-Row]] | |||
Screenshot Wii Flipper-Flop Two Player.png|[[Flipper-Flop 2#Two Player|Flipper-Flop]] | |||
Screenshot Wii Launch Party Two Player Practice A.png|[[Launch Party#Two Player|Launch Party]] ([[Practice]]) | |||
Screenshot Wii Launch Party Two Player.png|[[Launch Party#Two Player|Launch Party]] | |||
Screenshot Wii Tap Troupe Two Player.png|[[Tap Troupe#Two Player|Tap Troupe]] | |||
Screenshot Wii Karate Man Two Player.png|[[Karate Man Combos!#Two Player|Karate Man]] | |||
</gallery> | |||
;Extra Games | ;Extra Games | ||
<gallery> | |||
Screenshot Wii Extra Games.png|Menu | |||
Screenshot Wii The Clappy Trio.png|[[The Clappy Trio 2|The Clappy Trio]] | |||
Screenshot Wii Sneaky Spirits.png|[[Sneaky Spirits 2|Sneaky Spirits]] | |||
Screenshot Wii Power Calligraphy.png|[[Power Calligraphy]] | |||
Screenshot Wii Tap Trial.png|[[Tap Trial]] | |||
</gallery> | |||
;Endless Games | ;Endless Games | ||
<gallery> | |||
Screenshot Wii Endless Games.png|Menu | |||
Screenshot Wii Mr. Upbeat.png|[[Mr. Upbeat]] | |||
Screenshot Wii Wake-Up Caller.png|[[Wake-Up Caller]] | |||
Screenshot Wii Munchy Monk.png|[[Munchy Monk (Wii)|Munchy Monk]] | |||
Screenshot Wii Lady Cupid.png|[[Lady Cupid]] | |||
Screenshot Wii Manzai Practice.png|[[Manzai]] ([[Practice]]) | |||
Screenshot Wii Manzai.png|[[Manzai]] | |||
Screenshot Wii Basket.png|[[Endless Remix]] (Basket) | |||
Screenshot Wii Kaeru Tobi.png|[[Endless Remix]] (Kaeru Tobi) | |||
Screenshot Wii Manzai Endless Remix.png|[[Endless Remix]] ([[Manzai]]) | |||
Screenshot Wii Chameleon.png|[[Endless Remix]] (Chameleon) | |||
</gallery> | |||
;Two-Player Endless Games | ;Two-Player Endless Games | ||
<gallery> | |||
Screenshot Wii Two-Player Endless Games.png|Menu | |||
Screenshot Wii Clap Trap.png|[[Clap Trap]] | |||
Screenshot Wii Mochi Pounding Practice.png|[[Mochi Pounding]] ([[Practice]]) | |||
Screenshot Wii Mochi Pounding.png|[[Mochi Pounding]] | |||
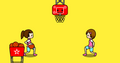
Screenshot Wii Kung Fu Ball.png|[[Kung Fu Ball]] | |||
Screenshot Wii Pirate Crew.png|[[Pirate Crew]] | |||
Screenshot Wii Bossa Nova Two Player.png|[[Bossa Nova#Two-Player Endless Game|Bossa Nova]] | |||
</gallery> | |||
;Rhythm Toys | ;Rhythm Toys | ||
<gallery> | |||
Screenshot Wii Rhythm Toys.png|Menu | |||
Screenshot Wii Toy Car.png|[[Toy Car]] | |||
Screenshot Wii Police Call Intro.png|[[Police Call]] (opening) | |||
Screenshot Wii Police Call Top Hat.png|Police Call (hidden top hat character) | |||
Screenshot Wii Police Call.png|Police Call | |||
Screenshot Wii Police Call Secret.png|Police Call (secret) | |||
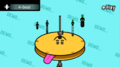
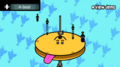
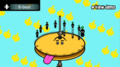
Screenshot Wii Hi-Hat.png|[[Hi-Hat]] | |||
Screenshot Wii Hi-Hat Demo.png|Hi-Hat (demo) | |||
Screenshot Wii Hi-Hat (Bluebirds).png|Hi-Hat ([[Blue Birds|Bluebirds]]) | |||
Screenshot Wii Hi-Hat (Arabian Theme).png|Hi-Hat ([[Rhythm Tweezers 2|Arabian Theme]]) | |||
Screenshot Wii Hi-Hat (Title Theme).png|Hi-Hat ([[Title Screen#Rhythm Heaven Fever|Title Theme]]) | |||
Screenshot Wii Rhythm Fighter Practice.png|[[Rhythm Fighter]] ([[Practice]]) | |||
Screenshot Wii Rhythm Fighter.png|[[Rhythm Fighter]] | |||
</gallery> | |||
===Miscellaneous=== | ===Miscellaneous=== | ||
;[[Title]] Screens | |||
<gallery> | |||
Screenshot Wii Title JP.png|Title screen in ''Minna no Rhythm Tengoku'' | |||
Screenshot Wii Title US.png|Title screen in ''Rhythm Heaven Fever'' | |||
Screenshot Wii Title EU.png|Title screen in ''Beat the Beat: Rhythm Paradise'' | |||
Screenshot Wii Title KR.png|Title screen in ''Rhythm World Wii'' | |||
</gallery> | |||
;Unsorted | |||
<gallery> | |||
Screenshot Wii Rhythm Test.png|[[Introduction#Rhythm Test|Rhythm Test]] | |||
Screenshot Wii Medal Corner.png|Medal Corner | |||
Screenshot Wii Two-Player Menu.png|[[Two-Player Menu]] | |||
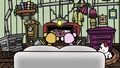
Screenshot Wii Café.png|[[Café]] | |||
Screenshot Wii Listen to Music.png|[[Listen to Music]] | |||
Screenshot Wii Read Something.png|[[Read Something (Rhythm Heaven Fever)|Read Something]] | |||
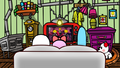
Screenshot Wii Cast Café.png|The Café on the [[Cast#Rhythm_Heaven_Fever|''Rhythm Heaven Fever'' Cast]] | |||
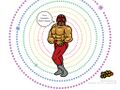
Screenshot Wii Perfect Campaign Karate Man.png|A [[Perfect Campaign]] running on [[Karate Man (Wii)|Karate Man]] | |||
Screenshot Wii Perfect.png|Receiving a [[Perfect]] on Karate Man | |||
</gallery> | |||
==Box Art== | ==Box Art== | ||
<gallery> | <gallery> | ||
Boxart Wii Minna no Rhythm Tengoku. | Boxart Wii Minna no Rhythm Tengoku.png|''Minna no Rhythm Tengoku'' boxart | ||
Boxart Wii Rhythm Heaven Fever | Boxart Wii Minna no Rhythm Tengoku Back.png|''Minna no Rhythm Tengoku'' boxart (back) | ||
Boxart Wii Rhythm Heaven Fever USZ.jpg|''Rhythm Heaven Fever'' boxart | |||
Boxart Wii Rhythm Heaven Fever USZ Back.png|''Rhythm Heaven Fever'' boxart (back) | |||
Boxart Wii Beat the Beat Rhythm Paradise UKV.jpg|''Beat the Beat: Rhythm Paradise'' boxart | Boxart Wii Beat the Beat Rhythm Paradise UKV.jpg|''Beat the Beat: Rhythm Paradise'' boxart | ||
Boxart Wii Beat the Beat Rhythm Paradise UKV Back.png|''Beat the Beat: Rhythm Paradise'' boxart (back) | |||
Boxart Wii Beat the Beat Rhythm Paradise EAP.png|''Beat the Beat: Rhythm Paradise'' (Spanish and Portuguese) boxart | |||
Boxart Wii Beat the Beat Rhythm Paradise EAP Back.png|''Beat the Beat: Rhythm Paradise'' (Spanish and Portuguese) boxart (back) | |||
Boxart Wii Beat the Beat Rhythm Paradise FRA.png|''Beat the Beat: Rhythm Paradise'' (French) boxart | |||
Boxart Wii Beat the Beat Rhythm Paradise FRA Back.jpg|''Beat the Beat: Rhythm Paradise'' (French) boxart (back) | |||
Boxart Wii Beat the Beat Rhythm Paradise NOE.png|''Beat the Beat: Rhythm Paradise'' (German) boxart | |||
Boxart Wii Beat the Beat Rhythm Paradise NOE Back.png|''Beat the Beat: Rhythm Paradise'' (German) boxart (back) | |||
Boxart Wii Beat the Beat Rhythm Paradise ITA.png|''Beat the Beat: Rhythm Paradise'' (Italian) boxart | |||
Boxart Wii Beat the Beat Rhythm Paradise ITA Back.png|''Beat the Beat: Rhythm Paradise'' (Italian) boxart (back) | |||
Boxart Wii Beat the Beat Rhythm Paradise HOL.png|''Beat the Beat: Rhythm Paradise'' (Dutch) boxart | |||
Boxart Wii Beat the Beat Rhythm Paradise SWD.png|''Beat the Beat: Rhythm Paradise'' (Sweden) boxart | |||
Boxart Wii Beat the Beat Rhythm Paradise AUS.png|''Beat the Beat: Rhythm Paradise'' (Australian) boxart | |||
Boxart Wii Beat the Beat Rhythm Paradise AUS Back.png|''Beat the Beat: Rhythm Paradise'' (Australian) boxart (back) | |||
Boxart Wii Rhythm World Wii.jpg|''Rhythm World Wii'' boxart | Boxart Wii Rhythm World Wii.jpg|''Rhythm World Wii'' boxart | ||
Boxart Wii Rhythm World Wii Back.jpg|''Rhythm World Wii'' boxart (back) | |||
</gallery> | |||
==Wii U Virtual Console Splash Screen== | |||
<gallery> | |||
Virtual Console Wii U Minna no Rhythm Tengoku.png|''Minna no Rhythm Tengoku'' splash screen | |||
Virtual Console Wii U Rhythm Heaven Fever.png|''Rhythm Heaven Fever'' splash screen | |||
Virtual Console Wii U Beat the Beat Rhythm Paradise.png|''Beat the Beat: Rhythm Paradise'' splash screen | |||
</gallery> | </gallery> | ||
==Miscellaneous== | ==Miscellaneous== | ||
===[[Wallpapers]]=== | |||
{{TabStart}}{{TabHeader|Japanese website}} | |||
<gallery position=center spacing=small> | |||
somj_a_1920x1200.jpg|1920×1200 | |||
somj_a_1600x1200.jpg|1600×1200 | |||
somj_a_1280x1024.jpg|1280×1024 | |||
somj_a_1280x800.jpg|1280×800 | |||
somj_a_1280x768.jpg|1280×768 | |||
somj_a_1024x768.jpg|1024×768 | |||
</gallery> | |||
<gallery position=center spacing=small> | |||
somj_b_1920x1200.jpg|1920×1200 | |||
somj_b_1600x1200.jpg|1600×1200 | |||
somj_b_1280x1024.jpg|1280×1024 | |||
somj_b_1280x800.jpg|1280×800 | |||
somj_b_1280x768.jpg|1280×768 | |||
somj_b_1024x768.jpg|1024×768 | |||
</gallery> | |||
<gallery position=center spacing=small> | |||
somj_c_1920x1200.jpg|1920×1200 | |||
somj_c_1600x1200.jpg|1600×1200 | |||
somj_c_1280x1024.jpg|1280×1024 | |||
somj_c_1280x800.jpg|1280×800 | |||
somj_c_1280x768.jpg|1280×768 | |||
somj_c_1024x768.jpg|1024×768 | |||
</gallery> | |||
<gallery position=center spacing=small> | |||
somj_d_1920x1200.jpg|1920×1200 | |||
somj_d_1600x1200.jpg|1600×1200 | |||
somj_d_1280x1024.jpg|1280×1024 | |||
somj_d_1280x800.jpg|1280×800 | |||
somj_d_1280x768.jpg|1280×768 | |||
somj_d_1024x768.jpg|1024×768 | |||
</gallery> | |||
<gallery position=center spacing=small> | |||
somj_e_1920x1200.jpg|1920×1200 | |||
somj_e_1600x1200.jpg|1600×1200 | |||
somj_e_1280x1024.jpg|1280×1024 | |||
somj_e_1280x800.jpg|1280×800 | |||
somj_e_1280x768.jpg|1280×768 | |||
somj_e_1024x768.jpg|1024×768 | |||
</gallery> | |||
<gallery position=center spacing=small> | |||
somj_f_1920x1200.jpg|1920×1200 | |||
somj_f_1600x1200.jpg|1600×1200 | |||
somj_f_1280x1024.jpg|1280×1024 | |||
somj_f_1280x800.jpg|1280×800 | |||
somj_f_1280x768.jpg|1280×768 | |||
somj_f_1024x768.jpg|1024×768 | |||
</gallery> | |||
<gallery position=center spacing=small> | |||
somj_g_1920x1200.jpg|1920×1200 | |||
somj_g_1600x1200.jpg|1600×1200 | |||
somj_g_1280x1024.jpg|1280×1024 | |||
somj_g_1280x800.jpg|1280×800 | |||
somj_g_1280x768.jpg|1280×768 | |||
somj_g_1024x768.jpg|1024×768 | |||
</gallery> | |||
<gallery position=center spacing=small> | |||
somj_h_1920x1200.jpg|1920×1200 | |||
somj_h_1600x1200.jpg|1600×1200 | |||
somj_h_1280x1024.jpg|1280×1024 | |||
somj_h_1280x800.jpg|1280×800 | |||
somj_h_1280x768.jpg|1280×768 | |||
somj_h_1024x768.jpg|1024×768 | |||
</gallery> | |||
<gallery position=center spacing=small> | |||
somj_i_1920x1200.jpg|1920×1200 | |||
somj_i_1600x1200.jpg|1600×1200 | |||
somj_i_1280x1024.jpg|1280×1024 | |||
somj_i_1280x800.jpg|1280×800 | |||
somj_i_1280x768.jpg|1280×768 | |||
somj_i_1024x768.jpg|1024×768 | |||
</gallery> | |||
<gallery position=center spacing=small> | |||
somj_j_1920x1200.jpg|1920×1200 | |||
somj_j_1600x1200.jpg|1600×1200 | |||
somj_j_1280x1024.jpg|1280×1024 | |||
somj_j_1280x800.jpg|1280×800 | |||
somj_j_1280x768.jpg|1280×768 | |||
somj_j_1024x768.jpg|1024×768 | |||
</gallery> | |||
<gallery position=center spacing=small> | |||
somj_k_1920x1200.jpg|1920×1200 | |||
somj_k_1600x1200.jpg|1600×1200 | |||
somj_k_1280x1024.jpg|1280×1024 | |||
somj_k_1280x800.jpg|1280×800 | |||
somj_k_1280x768.jpg|1280×768 | |||
somj_k_1024x768.jpg|1024×768 | |||
</gallery> | |||
<gallery position=center spacing=small> | |||
somj_l_1920x1200.jpg|1920×1200 | |||
somj_l_1600x1200.jpg|1600×1200 | |||
somj_l_1280x1024.jpg|1280×1024 | |||
somj_l_1280x800.jpg|1280×800 | |||
somj_l_1280x768.jpg|1280×768 | |||
somj_l_1024x768.jpg|1024×768 | |||
</gallery> | |||
<gallery position=center spacing=small> | |||
somj_m_1920x1200.jpg|1920×1200 | |||
somj_m_1600x1200.jpg|1600×1200 | |||
somj_m_1280x1024.jpg|1280×1024 | |||
somj_m_1280x800.jpg|1280×800 | |||
somj_m_1280x768.jpg|1280×768 | |||
somj_m_1024x768.jpg|1024×768 | |||
</gallery> | |||
<gallery position=center spacing=small> | |||
somj_n_1920x1200.jpg|1920×1200 | |||
somj_n_1600x1200.jpg|1600×1200 | |||
somj_n_1280x1024.jpg|1280×1024 | |||
somj_n_1280x800.jpg|1280×800 | |||
somj_n_1280x768.jpg|1280×768 | |||
somj_n_1024x768.jpg|1024×768 | |||
</gallery> | |||
{{TabHeader|American website}} | |||
<gallery position=center spacing=small> | |||
some_a_1920x1200.jpg|1920×1200 | |||
some_a_1280x1024.jpg|1280×1024 | |||
some_a_1024x768.jpg|1024×768 | |||
</gallery> | |||
<gallery position=center spacing=small> | |||
some_b_1920x1200.jpg|1920×1200 | |||
some_b_1280x1024.jpg|1280×1024 | |||
some_b_1024x768.jpg|1024×768 | |||
</gallery> | |||
<gallery position=center spacing=small> | |||
some_c_1920x1200.jpg|1920×1200 | |||
some_c_1280x1024.jpg|1280×1024 | |||
some_c_1024x768.jpg|1024×768 | |||
</gallery> | |||
<gallery position=center spacing=small> | |||
some_d_1920x1200.jpg|1920×1200 | |||
some_d_1280x1024.jpg|1280×1024 | |||
some_d_1024x768.jpg|1024×768 | |||
</gallery> | |||
<gallery position=center spacing=small> | |||
some_e_1920x1200.jpg|1920×1200 | |||
some_e_1280x1024.jpg|1280×1024 | |||
some_e_1024x768.jpg|1024×768 | |||
</gallery> | |||
<gallery position=center spacing=small> | |||
some_f_1920x1200.jpg|1920×1200 | |||
some_f_1280x1024.jpg|1280×1024 | |||
some_f_1024x768.jpg|1024×768 | |||
</gallery> | |||
<gallery position=center spacing=small> | |||
some_g_1920x1200.jpg|1920×1200 | |||
some_g_1280x1024.jpg|1280×1024 | |||
some_g_1024x768.jpg|1024×768 | |||
</gallery> | |||
<gallery position=center spacing=small> | |||
some_h_1920x1200.jpg|1920×1200 | |||
some_h_1280x1024.jpg|1280×1024 | |||
some_h_1024x768.jpg|1024×768 | |||
</gallery> | |||
<gallery position=center spacing=small> | |||
some_i_1920x1200.jpg|1920×1200 | |||
some_i_1280x1024.jpg|1280×1024 | |||
some_i_1024x768.jpg|1024×768 | |||
</gallery> | |||
<gallery position=center spacing=small> | |||
some_j_1920x1200.jpg|1920×1200 | |||
some_j_1280x1024.jpg|1280×1024 | |||
some_j_1024x768.jpg|1024×768 | |||
</gallery> | |||
<gallery position=center spacing=small> | |||
some_k_1920x1200.jpg|1920×1200 | |||
some_k_1280x1024.jpg|1280×1024 | |||
some_k_1024x768.jpg|1024×768 | |||
</gallery> | |||
<gallery position=center spacing=small> | |||
some_l_1920x1200.jpg|1920×1200 | |||
some_l_1280x1024.jpg|1280×1024 | |||
some_l_1024x768.jpg|1024×768 | |||
</gallery> | |||
<gallery position=center spacing=small> | |||
some_m_1920x1200.jpg|1920×1200 | |||
some_m_1280x1024.jpg|1280×1024 | |||
some_m_1024x768.jpg|1024×768 | |||
</gallery> | |||
<gallery position=center spacing=small> | |||
some_n_1920x1200.jpg|1920×1200 | |||
some_n_1280x1024.jpg|1280×1024 | |||
some_n_1024x768.jpg|1024×768 | |||
</gallery> | |||
{{TabHeader|European website}} | |||
<gallery position=center spacing=small> | |||
somp_a_1920x1200.jpg|1920×1200 | |||
somp_a_1600x1200.jpg|1600×1200 | |||
somp_a_1280x1024.jpg|1280×1024 | |||
somp_a_1280x800.jpg|1280×800 | |||
somp_a_1280x768.jpg|1280×768 | |||
somp_a_1024x768.jpg|1024×768 | |||
</gallery> | |||
<gallery position=center spacing=small> | |||
somp_b_1920x1200.jpg|1920×1200 | |||
somp_b_1600x1200.jpg|1600×1200 | |||
somp_b_1280x1024.jpg|1280×1024 | |||
somp_b_1280x800.jpg|1280×800 | |||
somp_b_1280x768.jpg|1280×768 | |||
somp_b_1024x768.jpg|1024×768 | |||
</gallery> | |||
<gallery position=center spacing=small> | |||
somp_c_1920x1200.jpg|1920×1200 | |||
somp_c_1600x1200.jpg|1600×1200 | |||
somp_c_1280x1024.jpg|1280×1024 | |||
somp_c_1280x800.jpg|1280×800 | |||
somp_c_1280x768.jpg|1280×768 | |||
somp_c_1024x768.jpg|1024×768 | |||
</gallery> | |||
<gallery position=center spacing=small> | |||
somp_d_1920x1200.jpg|1920×1200 | |||
somp_d_1600x1200.jpg|1600×1200 | |||
somp_d_1280x1024.jpg|1280×1024 | |||
somp_d_1280x800.jpg|1280×800 | |||
somp_d_1280x768.jpg|1280×768 | |||
somp_d_1024x768.jpg|1024×768 | |||
</gallery> | |||
<gallery position=center spacing=small> | |||
somp_e_1920x1200.jpg|1920×1200 | |||
somp_e_1600x1200.jpg|1600×1200 | |||
somp_e_1280x1024.jpg|1280×1024 | |||
somp_e_1280x800.jpg|1280×800 | |||
somp_e_1280x768.jpg|1280×768 | |||
somp_e_1024x768.jpg|1024×768 | |||
</gallery> | |||
<gallery position=center spacing=small> | |||
somp_f_1920x1200.jpg|1920×1200 | |||
somp_f_1600x1200.jpg|1600×1200 | |||
somp_f_1280x1024.jpg|1280×1024 | |||
somp_f_1280x800.jpg|1280×800 | |||
somp_f_1280x768.jpg|1280×768 | |||
somp_f_1024x768.jpg|1024×768 | |||
</gallery> | |||
<gallery position=center spacing=small> | |||
somp_g_1920x1200.jpg|1920×1200 | |||
somp_g_1600x1200.jpg|1600×1200 | |||
somp_g_1280x1024.jpg|1280×1024 | |||
somp_g_1280x800.jpg|1280×800 | |||
somp_g_1280x768.jpg|1280×768 | |||
somp_g_1024x768.jpg|1024×768 | |||
</gallery> | |||
<gallery position=center spacing=small> | |||
somp_h_1920x1200.jpg|1920×1200 | |||
somp_h_1600x1200.jpg|1600×1200 | |||
somp_h_1280x1024.jpg|1280×1024 | |||
somp_h_1280x800.jpg|1280×800 | |||
somp_h_1280x768.jpg|1280×768 | |||
somp_h_1024x768.jpg|1024×768 | |||
</gallery> | |||
<gallery position=center spacing=small> | |||
somp_i_1920x1200.jpg|1920×1200 | |||
somp_i_1600x1200.jpg|1600×1200 | |||
somp_i_1280x1024.jpg|1280×1024 | |||
somp_i_1280x800.jpg|1280×800 | |||
somp_i_1280x768.jpg|1280×768 | |||
somp_i_1024x768.jpg|1024×768 | |||
</gallery> | |||
<gallery position=center spacing=small> | |||
somp_j_1920x1200.jpg|1920×1200 | |||
somp_j_1600x1200.jpg|1600×1200 | |||
somp_j_1280x1024.jpg|1280×1024 | |||
somp_j_1280x800.jpg|1280×800 | |||
somp_j_1280x768.jpg|1280×768 | |||
somp_j_1024x768.jpg|1024×768 | |||
</gallery> | |||
<gallery position=center spacing=small> | |||
somp_k_1920x1200.jpg|1920×1200 | |||
somp_k_1600x1200.jpg|1600×1200 | |||
somp_k_1280x1024.jpg|1280×1024 | |||
somp_k_1280x800.jpg|1280×800 | |||
somp_k_1280x768.jpg|1280×768 | |||
somp_k_1024x768.jpg|1024×768 | |||
</gallery> | |||
<gallery position=center spacing=small> | |||
somp_l_1920x1200.jpg|1920×1200 | |||
somp_l_1600x1200.jpg|1600×1200 | |||
somp_l_1280x1024.jpg|1280×1024 | |||
somp_l_1280x800.jpg|1280×800 | |||
somp_l_1280x768.jpg|1280×768 | |||
somp_l_1024x768.jpg|1024×768 | |||
</gallery> | |||
<gallery position=center spacing=small> | |||
somp_m_1920x1200.jpg|1920×1200 | |||
somp_m_1600x1200.jpg|1600×1200 | |||
somp_m_1280x1024.jpg|1280×1024 | |||
somp_m_1280x800.jpg|1280×800 | |||
somp_m_1280x768.jpg|1280×768 | |||
somp_m_1024x768.jpg|1024×768 | |||
</gallery> | |||
<gallery position=center spacing=small> | |||
somp_n_1920x1200.jpg|1920×1200 | |||
somp_n_1600x1200.jpg|1600×1200 | |||
somp_n_1280x1024.jpg|1280×1024 | |||
somp_n_1280x800.jpg|1280×800 | |||
somp_n_1280x768.jpg|1280×768 | |||
somp_n_1024x768.jpg|1024×768 | |||
</gallery> | |||
{{TabHeader|Korean website}} | |||
<gallery position=center spacing=small> | |||
somk_a_1920x1200.jpg|1920×1200 | |||
somk_a_1600x1200.jpg|1600×1200 | |||
somk_a_1280x1024.jpg|1280×1024 | |||
somk_a_1280x800.jpg|1280×800 | |||
somk_a_1280x768.jpg|1280×768 | |||
somk_a_1024x768.jpg|1024×768 | |||
</gallery> | |||
<gallery position=center spacing=small> | |||
somk_b_1920x1200.jpg|1920×1200 | |||
somk_b_1600x1200.jpg|1600×1200 | |||
somk_b_1280x1024.jpg|1280×1024 | |||
somk_b_1280x800.jpg|1280×800 | |||
somk_b_1280x768.jpg|1280×768 | |||
somk_b_1024x768.jpg|1024×768 | |||
</gallery> | |||
<gallery position=center spacing=small> | |||
somk_c_1920x1200.jpg|1920×1200 | |||
somk_c_1600x1200.jpg|1600×1200 | |||
somk_c_1280x1024.jpg|1280×1024 | |||
somk_c_1280x800.jpg|1280×800 | |||
somk_c_1280x768.jpg|1280×768 | |||
somk_c_1024x768.jpg|1024×768 | |||
</gallery> | |||
<gallery position=center spacing=small> | |||
somk_d_1920x1200.jpg|1920×1200 | |||
somk_d_1600x1200.jpg|1600×1200 | |||
somk_d_1280x1024.jpg|1280×1024 | |||
somk_d_1280x800.jpg|1280×800 | |||
somk_d_1280x768.jpg|1280×768 | |||
somk_d_1024x768.jpg|1024×768 | |||
</gallery> | |||
<gallery position=center spacing=small> | |||
somk_e_1920x1200.jpg|1920×1200 | |||
somk_e_1600x1200.jpg|1600×1200 | |||
somk_e_1280x1024.jpg|1280×1024 | |||
somk_e_1280x800.jpg|1280×800 | |||
somk_e_1280x768.jpg|1280×768 | |||
somk_e_1024x768.jpg|1024×768 | |||
</gallery> | |||
<gallery position=center spacing=small> | |||
somk_f_1920x1200.jpg|1920×1200 | |||
somk_f_1600x1200.jpg|1600×1200 | |||
somk_f_1280x1024.jpg|1280×1024 | |||
somk_f_1280x800.jpg|1280×800 | |||
somk_f_1280x768.jpg|1280×768 | |||
somk_f_1024x768.jpg|1024×768 | |||
</gallery> | |||
<gallery position=center spacing=small> | |||
somk_g_1920x1200.jpg|1920×1200 | |||
somk_g_1600x1200.jpg|1600×1200 | |||
somk_g_1280x1024.jpg|1280×1024 | |||
somk_g_1280x800.jpg|1280×800 | |||
somk_g_1280x768.jpg|1280×768 | |||
somk_g_1024x768.jpg|1024×768 | |||
</gallery> | |||
<gallery position=center spacing=small> | |||
somk_O_1920x1200.jpg|1920×1200 | |||
somk_O_1600x1200.jpg|1600×1200 | |||
somk_O_1280x1024.jpg|1280×1024 | |||
somk_O_1280x800.jpg|1280×800 | |||
somk_O_1280x768.jpg|1280×768 | |||
somk_O_1024x768.jpg|1024×768 | |||
</gallery> | |||
<gallery position=center spacing=small> | |||
somk_i_1920x1200.jpg|1920×1200 | |||
somk_i_1600x1200.jpg|1600×1200 | |||
somk_i_1280x1024.jpg|1280×1024 | |||
somk_i_1280x800.jpg|1280×800 | |||
somk_i_1280x768.jpg|1280×768 | |||
somk_i_1024x768.jpg|1024×768 | |||
</gallery> | |||
<gallery position=center spacing=small> | |||
somk_j_1920x1200.jpg|1920×1200 | |||
somk_j_1600x1200.jpg|1600×1200 | |||
somk_j_1280x1024.jpg|1280×1024 | |||
somk_j_1280x800.jpg|1280×800 | |||
somk_j_1280x768.jpg|1280×768 | |||
somk_j_1024x768.jpg|1024×768 | |||
</gallery> | |||
<gallery position=center spacing=small> | |||
somk_k_NOK_1920x1200.jpg|1920×1200 | |||
somk_k_NOK_1600x1200.jpg|1600×1200 | |||
somk_k_NOK_1280x1024.jpg|1280×1024 | |||
somk_k_NOK_1280x800.jpg|1280×800 | |||
somk_k_NOK_1280x768.jpg|1280×768 | |||
somk_k_NOK_1024x768.jpg|1024×768 | |||
</gallery> | |||
<gallery position=center spacing=small> | |||
somk_l_1920x1200.jpg|1920×1200 | |||
somk_l_1600x1200.jpg|1600×1200 | |||
somk_l_1280x1024.jpg|1280×1024 | |||
somk_l_1280x800.jpg|1280×800 | |||
somk_l_1280x768.jpg|1280×768 | |||
somk_l_1024x768.jpg|1024×768 | |||
</gallery> | |||
<gallery position=center spacing=small> | |||
somk_m_1920x1200.jpg|1920×1200 | |||
somk_m_1600x1200.jpg|1600×1200 | |||
somk_m_1280x1024.jpg|1280×1024 | |||
somk_m_1280x800.jpg|1280×800 | |||
somk_m_1280x768.jpg|1280×768 | |||
somk_m_1024x768.jpg|1024×768 | |||
</gallery> | |||
<gallery position=center spacing=small> | |||
somk_n_1920x1200.jpg|1920×1200 | |||
somk_n_1600x1200.jpg|1600×1200 | |||
somk_n_1280x1024.jpg|1280×1024 | |||
somk_n_1280x800.jpg|1280×800 | |||
somk_n_1280x768.jpg|1280×768 | |||
somk_n_1024x768.jpg|1024×768 | |||
</gallery> | |||
{{TabEnd}} | |||
===Soundtrack CDs=== | |||
<gallery> | <gallery> | ||
Poster CD Minna no Rhythm Tengoku Zen Kyoku-shu.png|Promotional poster for ''[[Minna no Rhythm Tengoku Zen Kyoku-shu]]'' | |||
Cover CD Minna no Rhythm Tengoku Zen Vocal-shu.jpg|Cover for [[Minna no Rhythm Tengoku Zen Vocal-shu]] | Cover CD Minna no Rhythm Tengoku Zen Kyoku-shu.jpg|Cover for ''Minna no Rhythm Tengoku Zen Kyoku-shu'' | ||
Cover CD Minna no Rhythm Tengoku Zen Vocal-shu.jpg|Cover for ''[[Minna no Rhythm Tengoku Zen Vocal-shu]]'' | |||
Cover CD Beat the Beat Rhythm Paradise The Soundtrack.png|Cover for ''[[Beat the Beat: Rhythm Paradise The Soundtrack]]'' | |||
</gallery> | </gallery> | ||
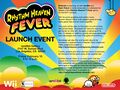
===''Rhythm Heaven Fever'' iam8bit Launch Event=== | |||
<gallery> | <gallery> | ||
Promotion Wii iam8bit Poster.jpg|Advertisement of the event | |||
Promotion Wii Logo LED Sign.png|A glowing LED sign of the game's logo. | |||
Promotion Wii See and Saw Figurine A.jpg|The [[See and Saw]] figurine | |||
Promotion Wii See and Saw Figurine B.webp|Closer view of the figurine | |||
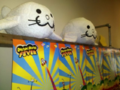
Promotion Wii Banner and Flipper Plushies.jpg|Image with ''[[Rhythm Heaven Fever]]'' banners and the [[Captain Tuck and the Flippers|Flipper]] plushies | |||
Promotion Wii Flipper Plushies.png|Closer view of the plushies | |||
Promotion Wii Launch Event Headphones.png|''Rhythm Heaven Fever'' headphones | |||
Promotion Wii Launch Event T-Shirts.png|''Rhythm Heaven Fever'' T-shirts | |||
Promotion Wii Marshal Cutouts.png|Cutouts of [[Marshal]] | |||
Promotion Wii Robot Head.png|[[Robots (Screwbot Factory)|Robot]] head | |||
Promotion Wii Ringside Wrestler Mask.jpg|A shot of a person wearing a [[Wrestler]] mask | |||
Promotion Wii Wrestler Mask and Robot head.png|A higher quality shot of the two previous items | |||
</gallery> | </gallery> | ||
===Other=== | |||
<gallery> | <gallery> | ||
Merchandise Wii Sticker Sheet.jpg|''Minna no Rhythm Tengoku'' sticker sheet | |||
Merchandise Wii Clear File.jpg|''Minna no Rhythm Tengoku'' clear file | |||
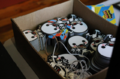
Merchandise Wii Drumsticks.jpg|''Rhythm Heaven Fever'' drumsticks | |||
Merchandise Wii Club Nintendo Calendar Front.jpg|Front of the ''Rhythm Heaven Fever'' calendar distributed by [[niwanetwork:Club Nintendo|Club Nintendo]] | |||
Merchandise Wii Club Nintendo Calendar Back.jpg|Back of the ''Rhythm Heaven Fever'' calendar distributed by Club Nintendo | |||
Merchandise Wii Club Nintendo Towel A.png|[[Samurai Slice 2]] hand towel distributed by Club Nintendo Japan | |||
Merchandise Wii Club Nintendo Towel B.png|[[Flipper-Flop]] hand towel distributed by Club Nintendo Japan | |||
Artwork LINE Rhythm Heaven Fever.jpg|Promotional LINE image for ''Minna no Rhythm Tengoku'''s rerelease on the Wii U Virtual Console | |||
</gallery> | </gallery> | ||
{{Galleries}} | {{Galleries}} | ||
{{RHF}} | {{RHF}} | ||
Latest revision as of 02:44, 5 December 2025
This is a gallery of images covering the game Rhythm Heaven Fever.
Logos

Minna no Rhythm Tengoku logo (.svg version)

Rhythm Heaven Fever logo

Rhythm Heaven Fever logo (.svg version)

Beat the Beat: Rhythm Paradise logo

Rhythm World Wii logo (.svg version)

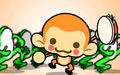
Unused Rhythm Tengoku logo (.svg version)


Artwork
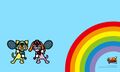
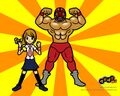
Group artwork
The Tall Tappers (Tap Troupe)

The Tall Tappers (Tap Troupe)

The Tall Tappers (Tap Troupe)


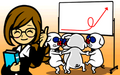
Characters

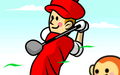
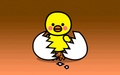
Monkey (Hole in One)

Mandrill (Hole in One)

Golfer (Hole in One)

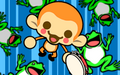
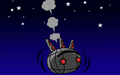
Robot (Screwbot Factory)

Robot (Screwbot Factory)

Robot (Screwbot Factory)

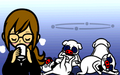
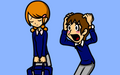
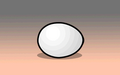
See and Saw (See-Saw)

See and Saw (See-Saw)

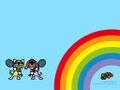
Small Monkey (Monkey Watch)

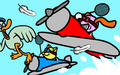
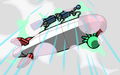
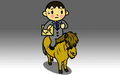
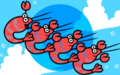
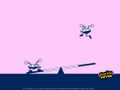
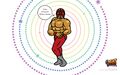
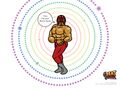
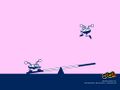
Forthington (Air Rally)
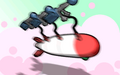
Baxter (Air Rally)
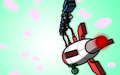
Baxter (Air Rally)

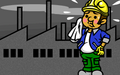
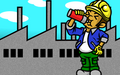
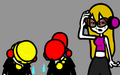
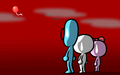
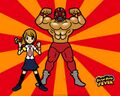
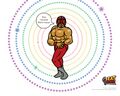
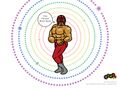
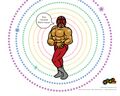
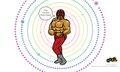
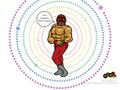
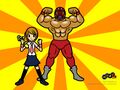
Wrestler (Ringside)

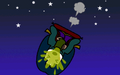
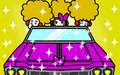
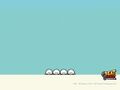
Party Cracker Model (Launch Party)

Bell Model (Launch Party)

Bowling Model (Launch Party)

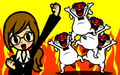
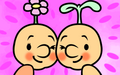
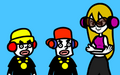
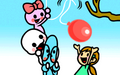
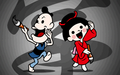
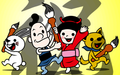
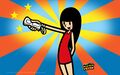
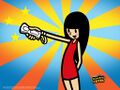
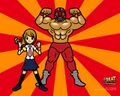
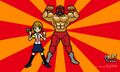
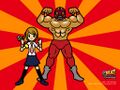
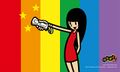
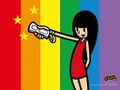
Love Posse (Love Rap)
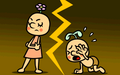
MC Adore (Love Rap)

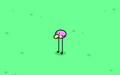
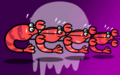
Shrimp (Shrimp Shuffle)
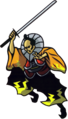
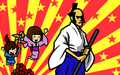
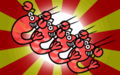
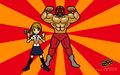
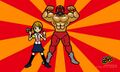
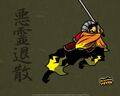
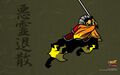
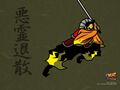
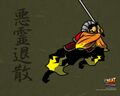
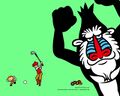
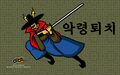
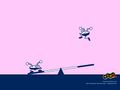
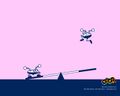
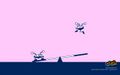
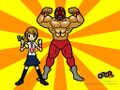
The Wandering Samurai (Samurai Slice 2)
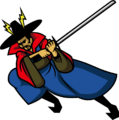
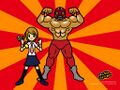
The Wandering Samurai (Samurai Slice 2 in Rhythm World Wii)


- Other

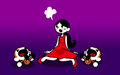
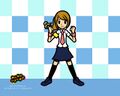
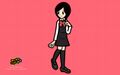
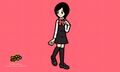
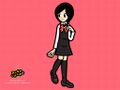
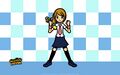
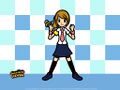
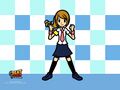
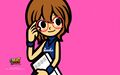
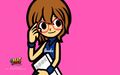
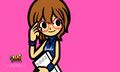
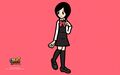
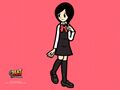
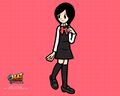
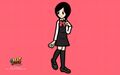
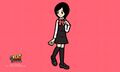
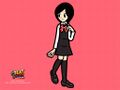
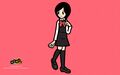
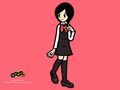
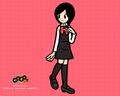
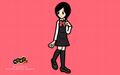
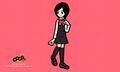
Title Girl

Title Girl

Title Girl

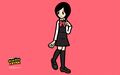
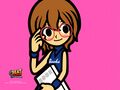
Introduction

Introduction

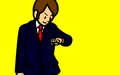
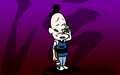
Marshal

Marshal

Marshal

Cam

Cam

Miss Ribbon

Miss Ribbon


Miscellaneous

Marshal (Minna no Rhythm Tengoku Zen Kyoku-shu)

Cam (Minna no Rhythm Tengoku Zen Kyoku-shu)

Miss Ribbon (Minna no Rhythm Tengoku Zen Kyoku-shu)

Soshi (Minna no Rhythm Tengoku Zen Vocal-shu)

Soshi (Minna no Rhythm Tengoku Zen Vocal-shu)

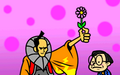
THE POSSIBLE (Minna no Rhythm Tengoku Zen Vocal-shu)

Canary CLUB (Minna no Rhythm Tengoku Zen Vocal-shu)


Sprites
Icons


- Other Regions

Remix 1 (Japanese)

Remix 1 (European)

Remix 2 (Japanese)

Remix 2 (European)

Remix 3 (Japanese)

Remix 3 (European)

Samurai Slice (Korean)

Remix 4 (Japanese)

Remix 4 (European)

Remix 5 (Japanese)

Remix 5 (European)

Remix 6 (Japanese)

Remix 6 (European)

Remix 7 (Japanese)

Remix 7 (European)

Samurai Slice 2 (Korean)

Remix 8 (Japanese)

Remix 8 (European)

Remix 9 (Japanese)

Remix 9 (European)

Remix 10 (Japanese)

Remix 10 (European)


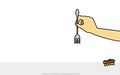
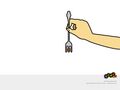
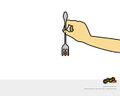
Fork Lifter

Tambourine

Ringside

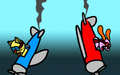
Micro-Row

Flipper-Flop

Launch Party

Tap Troupe

Karate Man


Game Menu icon for menus in the Medal Corner that have not yet been unlocked


- Miscellaneous

Game Menu icon for games that have not yet been unlocked

Perfect Medal


- Unused

Unused Game Select icon

Epilogues
- Stage 1
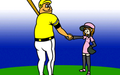
Hole in One (OK)

Hole in One (Superb)
Screwbot Factory (Try Again)

Screwbot Factory (OK)
Screwbot Factory (Superb)

See-Saw (Try Again)

See-Saw (OK)

See-Saw (Superb)
Double Date (Try Again)
Double Date (OK)
Double Date (Superb)
Remix 1 (Try Again)
Remix 1 (OK)

Remix 1 (Superb)


- Stage 2
Fork Lifter (Try Again)

Fork Lifter (OK)

Fork Lifter (Superb)
Tambourine (Try Again)
Tambourine (OK)
Tambourine (Superb)
Board Meeting (Try Again)
Board Meeting (OK)
Board Meeting (Superb)
Monkey Watch (Try Again)
Monkey Watch (OK)
Monkey Watch (Superb)
Remix 2 (Try Again)
Remix 2 (OK)

Remix 2 (Superb)


- Stage 3
Working Dough (Try Again)

Working Dough (OK)

Working Dough (Superb)
Built to Scale (Try Again)
Built to Scale (OK)

Built to Scale (Superb)
Air Rally (Try Again)
Air Rally (OK)
Air Rally (Superb)
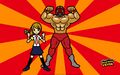
Figure Fighter (Try Again)
Figure Fighter (OK)
Figure Fighter (Superb)

Remix 3 (Try Again)

Remix 3 (OK)

Remix 3 (Superb)


- Stage 4
Ringside (Try Again)
Ringside (OK)
Ringside (Superb)
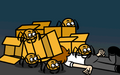
Packing Pests (Try Again)
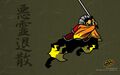
Packing Pests (OK)
Packing Pests (Superb)

Micro-Row (Try Again)

Micro-Row (OK)

Micro-Row (Superb)

Samurai Slice (Try Again)
Samurai Slice (OK)
Samurai Slice (Superb)
Remix 4 (Try Again)
Remix 4 (OK)
Remix 4 (Superb)


- Stage 5

Catch of the Day (Try Again)
Catch of the Day (OK)
Catch of the Day (Superb)
Flipper-Flop (Try Again)
Flipper-Flop (OK)

Flipper-Flop (Superb)
Exhibition Match (Try Again)
Exhibition Match (OK)

Exhibition Match (Superb)
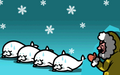
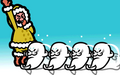
Flock Step (Try Again)

Flock Step (OK)
Flock Step (Superb)

Remix 5 (Try Again)

Remix 5 (OK)

Remix 5 (Superb)


- Stage 6

Launch Party (Try Again)
Launch Party (OK)
Launch Party (Superb)
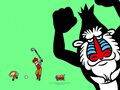
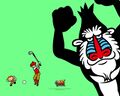
Donk-Donk (Try Again)
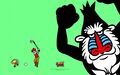
Donk-Donk (OK)
Donk-Donk (Superb)
Bossa Nova (Try Again)

Bossa Nova (OK)
Bossa Nova (Superb)
Love Rap (Try Again)
Love Rap (OK)

Love Rap (Superb)
Remix 6 (Try Again)

Remix 6 (OK)
Remix 6 (Superb)


- Stage 7
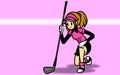
Tap Troupe (Try Again)
Tap Troupe (OK)
Tap Troupe (Superb)
Shrimp Shuffle (Try Again)
Shrimp Shuffle (OK)
Shrimp Shuffle (Superb)
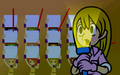
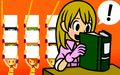
Cheer Readers (Try Again)
Cheer Readers (OK)

Cheer Readers (Superb)

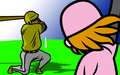
Karate Man (Try Again)

Karate Man (OK)
Karate Man (Superb)
Remix 7 (Try Again)
Remix 7 (OK)

Remix 7 (Superb)


- Credits
Night Walk (Try Again)
Night Walk (OK)
Night Walk (Superb)


- Stage 8

Samurai Slice 2 (Try Again)
Samurai Slice 2 (OK)

Samurai Slice 2 (Superb)
Working Dough 2 (Try Again)
Working Dough 2 (OK)

Working Dough 2 (Superb)

Built to Scale 2 (Try Again)

Built to Scale 2 (OK)

Built to Scale 2 (Superb)
Double Date 2 (Try Again)

Double Date 2 (OK)
Double Date 2 (Superb)
Remix 8 (Try Again)
Remix 8 (OK)
Remix 8 (Superb)


- Stage 9
Love Rap 2 (Try Again)

Love Rap 2 (OK)
Love Rap 2 (Superb)
Cheer Readers 2 (Try Again)
Cheer Readers 2 (OK)

Cheer Readers 2 (Superb)

Hole in One 2 (Try Again)
Hole in One 2 (OK)

Hole in One 2 (Superb)

Screwbot Factory 2 (Try Again)

Screwbot Factory 2 (OK)
Screwbot Factory 2 (Superb)

Remix 9 (Try Again)
Remix 9 (OK)

Remix 9 (Superb)


- Stage 10
Figure Fighter 2 (Try Again)

Figure Fighter 2 (OK)

Figure Fighter 2 (Superb)
Micro-Row 2 (Try Again)

Micro-Row 2 (OK)

Micro-Row 2 (Superb)
Packing Pests 2 (Try Again)
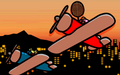
Packing Pests 2 (OK)
Packing Pests 2 (Superb)

Karate Man 2 (Try Again)
Karate Man 2 (OK)

Karate Man 2 (Superb)

Remix 10 (Try Again)
Remix 10 (OK)
Remix 10 (Superb)


- Extra Games
The Clappy Trio (Try Again)

The Clappy Trio (OK)
The Clappy Trio (Superb)
Sneaky Spirits (Try Again)
Sneaky Spirits (OK)

Sneaky Spirits (Superb)
Power Calligraphy (Try Again)
Power Calligraphy (OK)
Power Calligraphy (Superb)
Tap Trial (Try Again)

Tap Trial (OK)
Tap Trial (Superb)


Characters
- Rhythm Heaven Fever Cast
- Other

Mr. Game & Watch

Children (Rhythm World Wii)

Demon

Demon

Demon

Demon

Demon

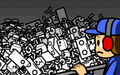
Reporter (Remix 4)

Pausegill

Threefish

Karate Joe (Remix 7)

Samurai Slice 2 little girl
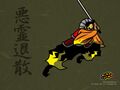
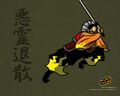
The Wandering Samurai (Samurai Slice 2)

The Wandering Samurai (Samurai Slice 2)

Mr. Game & Watch

The Wandering Samurai (Remix 8)

Karate Joe (Remix 9)

Cat (Remix 9)

Assistant (Remix 9)

Packing Pests bouquet (Remix 10)

Kung Fu Ball kappa
Screenshots
Prologues
- Stage 1


- Stage 2


- Stage 3


- Stage 4


- Stage 5


- Stage 6


- Stage 7


- Credits Game

- Stage 8


- Stage 9


- Stage 10


- Two-Player Menu


- Extra Games


Rhythm Games
- Stage 1


- Stage 2


- Stage 3


- Stage 4


- Stage 5


- Stage 6
Love Rap (End)


- Stage 7


- Credits Game

- Stage 8


- Stage 9
Love Rap 2 (End)


- Stage 10


- Two-Player Menu


- Extra Games

Menu


- Endless Games
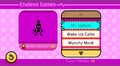
Menu
Endless Remix (Basket)
Endless Remix (Kaeru Tobi)
Endless Remix (Chameleon)


- Two-Player Endless Games
Menu


- Rhythm Toys
Menu

Police Call (opening)

Police Call (hidden top hat character)
Police Call

Police Call (secret)
Hi-Hat (demo)
Hi-Hat (Bluebirds)
Hi-Hat (Arabian Theme)
Hi-Hat (Title Theme)


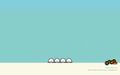
.png)
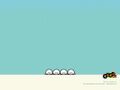
.png)
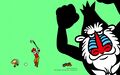
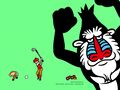
.png)


Miscellaneous
- Title Screens

Title screen in Minna no Rhythm Tengoku
Title screen in Rhythm Heaven Fever

Title screen in Beat the Beat: Rhythm Paradise
Title screen in Rhythm World Wii


- Unsorted

Medal Corner

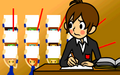
The Café on the Rhythm Heaven Fever Cast

A Perfect Campaign running on Karate Man
Receiving a Perfect on Karate Man


Box Art

Minna no Rhythm Tengoku boxart

Minna no Rhythm Tengoku boxart (back)

Rhythm Heaven Fever boxart

Rhythm Heaven Fever boxart (back)

Beat the Beat: Rhythm Paradise boxart

Beat the Beat: Rhythm Paradise boxart (back)

Beat the Beat: Rhythm Paradise (Spanish and Portuguese) boxart

Beat the Beat: Rhythm Paradise (Spanish and Portuguese) boxart (back)

Beat the Beat: Rhythm Paradise (French) boxart

Beat the Beat: Rhythm Paradise (French) boxart (back)

Beat the Beat: Rhythm Paradise (German) boxart

Beat the Beat: Rhythm Paradise (German) boxart (back)

Beat the Beat: Rhythm Paradise (Italian) boxart

Beat the Beat: Rhythm Paradise (Italian) boxart (back)

Beat the Beat: Rhythm Paradise (Dutch) boxart

Beat the Beat: Rhythm Paradise (Sweden) boxart

Beat the Beat: Rhythm Paradise (Australian) boxart

Beat the Beat: Rhythm Paradise (Australian) boxart (back)

Rhythm World Wii boxart

Rhythm World Wii boxart (back)


Wii U Virtual Console Splash Screen

Minna no Rhythm Tengoku splash screen

Rhythm Heaven Fever splash screen

Beat the Beat: Rhythm Paradise splash screen


Miscellaneous
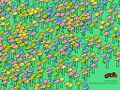
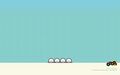
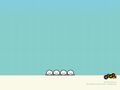
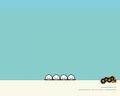
Wallpapers
1920×1200

1600×1200

1280×1024
1280×800
1280×768
1024×768


1920×1200
1600×1200
1280×1024

1280×800
1280×768
1024×768


1920×1200

1600×1200
1280×1024
1280×800
1280×768
1024×768


1920×1200
1600×1200
1280×1024
1280×800
1280×768
1024×768


1920×1200
1600×1200
1280×1024
1280×800

1280×768
1024×768


1920×1200

1600×1200
1280×1024
1280×800

1280×768

1024×768


1920×1200
1600×1200
1280×1024
1280×800

1280×768
1024×768


1920×1200
1600×1200
1280×1024

1280×800
1280×768

1024×768


1920×1200
1600×1200
1280×1024
1280×800
1280×768
1024×768


1920×1200

1600×1200
1280×1024
1280×800
1280×768

1024×768


1920×1200

1600×1200
1280×1024
1280×800
1280×768
1024×768


1920×1200

1600×1200
1280×1024

1280×800
1280×768
1024×768


1920×1200
1600×1200

1280×1024
1280×800
1280×768

1024×768


1920×1200

1600×1200
1280×1024
1280×800
1280×768
1024×768


1920×1200

1280×1024

1024×768


1920×1200
1280×1024
1024×768


1920×1200
1280×1024
1024×768


1920×1200
1280×1024
1024×768


1920×1200

1280×1024

1024×768


1920×1200
1280×1024
1024×768


1920×1200
1280×1024
1024×768


1920×1200
1280×1024

1024×768


1920×1200
1280×1024
1024×768


1920×1200

1280×1024
1024×768


1920×1200
1280×1024

1024×768


1920×1200

1280×1024
1024×768


1920×1200

1280×1024

1024×768


1920×1200
1280×1024
1024×768


1920×1200

1600×1200

1280×1024

1280×800

1280×768

1024×768


1920×1200
1600×1200
1280×1024
1280×800
1280×768
1024×768


1920×1200
1600×1200
1280×1024

1280×800

1280×768

1024×768


1920×1200
1600×1200
1280×1024
1280×800
1280×768
1024×768


1920×1200
1600×1200

1280×1024
1280×800

1280×768
1024×768


1920×1200
1600×1200
1280×1024
1280×800

1280×768
1024×768


1920×1200
1600×1200

1280×1024

1280×800
1280×768

1024×768


1920×1200
1600×1200
1280×1024

1280×800

1280×768

1024×768


1920×1200

1600×1200

1280×1024

1280×800
1280×768
1024×768


1920×1200

1600×1200

1280×1024

1280×800

1280×768

1024×768


1920×1200
1600×1200
1280×1024

1280×800
1280×768
1024×768


1920×1200
1600×1200
1280×1024
1280×800
1280×768
1024×768


1920×1200
1600×1200

1280×1024
1280×800
1280×768

1024×768


1920×1200
1600×1200
1280×1024
1280×800
1280×768
1024×768


1920×1200

1600×1200
1280×1024
1280×800
1280×768
1024×768


1920×1200
1600×1200
1280×1024
1280×800
1280×768
1024×768


1920×1200
1600×1200
1280×1024

1280×800
1280×768
1024×768


1920×1200
1600×1200
1280×1024
1280×800
1280×768
1024×768


1920×1200
1600×1200
1280×1024
1280×800

1280×768
1024×768


1920×1200
1600×1200
1280×1024

1280×800

1280×768

1024×768


1920×1200

1600×1200
1280×1024

1280×800

1280×768
1024×768


1920×1200
1600×1200
1280×1024
1280×800
1280×768
1024×768


1920×1200
1600×1200
1280×1024
1280×800

1280×768
1024×768


1920×1200

1600×1200

1280×1024

1280×800
1280×768
1024×768


1920×1200
1600×1200
1280×1024
1280×800
1280×768
1024×768


1920×1200
1600×1200

1280×1024
1280×800
1280×768
1024×768


1920×1200

1600×1200

1280×1024
1280×800
1280×768

1024×768


1920×1200
1600×1200
1280×1024
1280×800
1280×768

1024×768


Soundtrack CDs

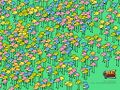
Promotional poster for Minna no Rhythm Tengoku Zen Kyoku-shu

Cover for Minna no Rhythm Tengoku Zen Kyoku-shu

Cover for Minna no Rhythm Tengoku Zen Vocal-shu


Rhythm Heaven Fever iam8bit Launch Event
Advertisement of the event

A glowing LED sign of the game's logo.

The See and Saw figurine

Closer view of the figurine

Image with Rhythm Heaven Fever banners and the Flipper plushies
Closer view of the plushies

Rhythm Heaven Fever headphones

Rhythm Heaven Fever T-shirts
Cutouts of Marshal
Robot head

A shot of a person wearing a Wrestler mask

A higher quality shot of the two previous items


Other
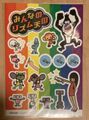
Minna no Rhythm Tengoku sticker sheet
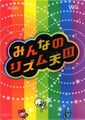
Minna no Rhythm Tengoku clear file
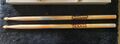
Rhythm Heaven Fever drumsticks

Front of the Rhythm Heaven Fever calendar distributed by Club Nintendo

Back of the Rhythm Heaven Fever calendar distributed by Club Nintendo

Samurai Slice 2 hand towel distributed by Club Nintendo Japan

Flipper-Flop hand towel distributed by Club Nintendo Japan

Promotional LINE image for Minna no Rhythm Tengoku's rerelease on the Wii U Virtual Console


Galleries
| |
|---|---|
|
| Rhythm Heaven Fever | ||
|---|---|---|
| Medal Corner | ||
| Rhythm Games | ||
| Two-Player Menu | ||
| Endless Games One Player |
 • •  • •  • •  • •  • •  | |
| Endless Games Two Player |
 • •  • •  • •  • •  | |
| Rhythm Toys |  • •  • •  • •  | |
| Extra Games |  • •  • •  • •  | |
| Miscellaneous | Title Screen • Rhythm Test • Listen to Music • Read Something • Perfect Campaign • Characters • The Rhythm League • Rhythm Heaven • Live House OGU • Development History • Seika Relay • •  • •  | |